
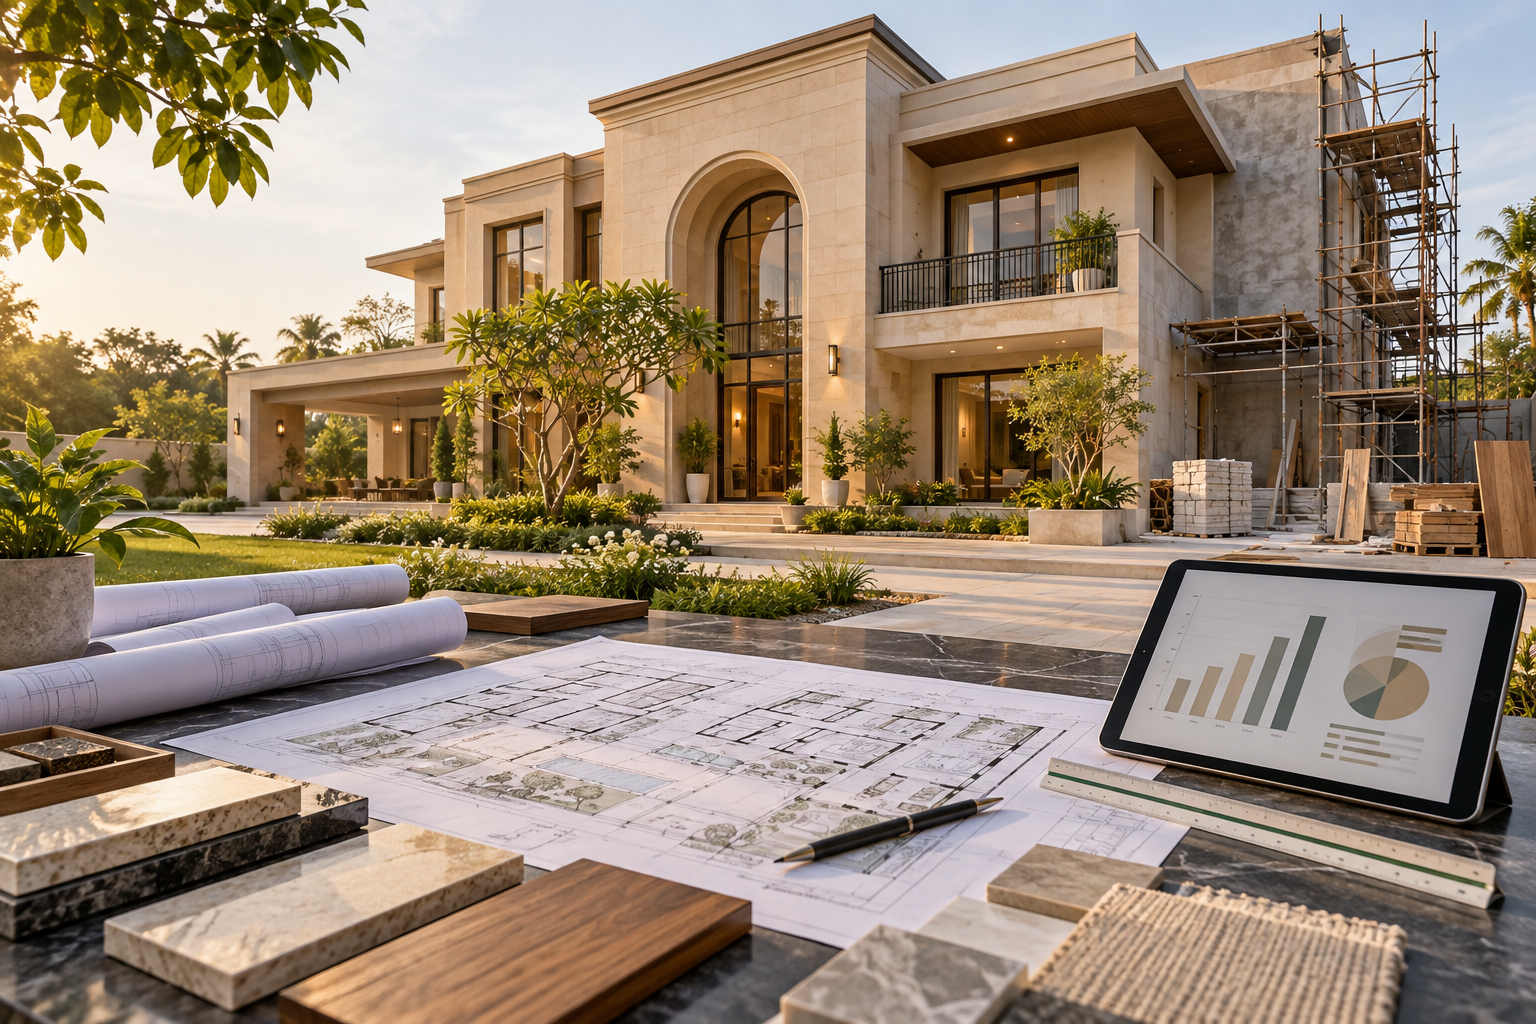
What Does It Cost to Build a Luxury Villa in Lucknow in 2026?
Explore practical 2026 construction-cost ranges for luxury villas in Lucknow, including what affects the per-square-foot rate, commonly excluded expenses, sample budgets and a complete planning checklist.
The cost of building a luxury villa is rarely answered accurately by quoting one rate per square foot. Two villas with the same built-up area can have very different budgets depending on their structural design, façade, glazing, interior finishes, mechanical and electrical systems, level of automation, landscaping and specialised features.
In Lucknow during 2026, published construction rates cover an unusually wide range. Some quotations refer only to civil construction, while others include flooring, electrical work, plumbing, sanitary fittings, doors, windows or limited interior work. A rate may appear attractive simply because many essential items have been excluded or assigned low provisional allowances.
A dependable luxury-villa budget must therefore begin with a clearly defined scope. The plot area, permitted coverage, total built-up area, number of floors, specifications, professional services, approvals, external works, taxes, contingency and expected completion standard must all be considered separately.
This chapter provides a practical budgeting framework for homeowners planning a luxury villa in Lucknow. The figures are indicative 2026 planning ranges—not fixed quotations—and should be refined through site information, coordinated drawings, material specifications and a detailed bill of quantities.
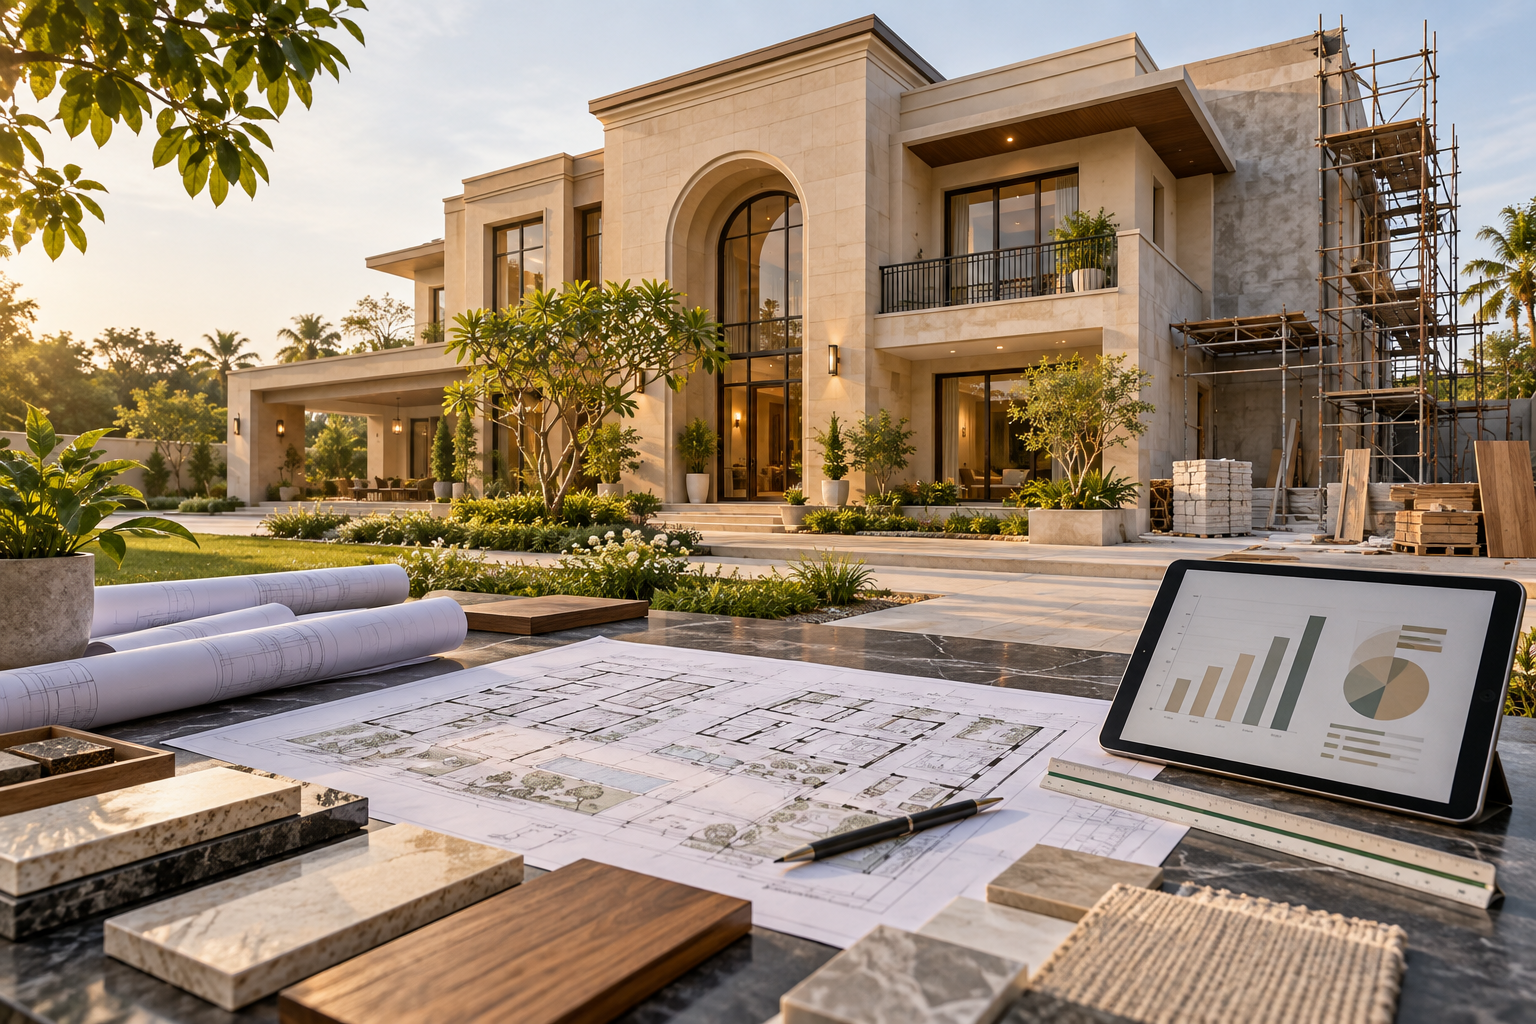
Why One Per-Square-Foot Rate Can Be Misleading
A per-square-foot rate is useful only when the area calculation, specifications and included work are clearly defined. One contractor may calculate the rate on the total slab area, another on the covered built-up area, and a third may include balconies, terraces, double-height spaces or projections differently. Even before materials are compared, the measurement basis can change the apparent cost.
The scope behind the rate is equally important. Some quotations cover the structure, masonry, plaster, basic electrical and plumbing work, flooring and paint. Others may also include windows, doors, sanitary fittings, wardrobes, modular kitchens, false ceilings, air-conditioning, automation or landscaping. A lower rate may therefore represent a smaller scope rather than better value.
Material allowances can create further differences. Statements such as “premium tiles,” “branded fittings” or “luxury windows” are too general for accurate budgeting. The quotation should specify brands or performance standards, unit rates, quantities, sizes, finishes and the treatment of any price difference if the owner selects a more expensive product.
Rates may also exclude design fees, structural engineering, approvals, soil testing, utility connections, taxes, external development, lifts, solar systems, loose furniture and contingency. Before comparing two proposals, homeowners should place their inclusions, exclusions, specifications and area calculations side by side. Only then does the rate per square foot become a meaningful comparison.
First Define What “Luxury” Includes
Luxury should describe the complete quality and performance of the villa—not simply the presence of marble, decorative lighting or imported fittings. A genuinely luxurious home combines thoughtful planning, comfortable proportions, reliable construction, climate-responsive design, refined materials and systems that remain practical to operate and maintain.
The architectural scope may include double-height spaces, large openings, cantilevers, terraces, courtyards and a carefully detailed façade. These features influence the structure, waterproofing, glazing, access equipment and construction time. Complex forms and junctions generally cost more than a simple building of the same floor area.
The specification may include high-performance windows, natural stone, premium flooring, customised doors, layered lighting, concealed air-conditioning, enhanced electrical capacity, water treatment, solar readiness, security systems and home automation. Bespoke kitchens, wardrobes, fixed furniture, acoustic treatments and specialist finishes can further increase the budget.
Luxury may also include a home elevator, swimming pool, landscaped garden, outdoor kitchen, terrace entertainment area, generator or battery backup, electric-vehicle charging and renewable-energy systems. These elements should be budgeted as clearly identified packages rather than assumed to be included within a general construction rate.
The most useful definition of luxury is therefore project-specific. Before estimating the cost, the homeowner and design team should prepare a written brief describing the intended spaces, performance standards, major materials, building systems, interior scope and special features. This converts an aspiration into a scope that can be designed, priced and controlled.
Practical 2026 Cost Ranges for Luxury Villas in Lucknow
For preliminary planning in Lucknow during 2026, the following broad ranges may be used for a professionally designed villa. They assume competent construction, coordinated services and progressively higher specifications, but the precise inclusions must always be confirmed.
• Premium architectural construction: approximately : Rs 2,800–Rs 3,500 per sq ft.
This range may support a well-planned structure, dependable waterproofing, branded electrical and plumbing systems, good-quality windows, premium but controlled finishes and a refined façade. Extensive bespoke interiors, lifts, pools and high-end automation would normally be additional.
• Luxury villa construction: approximately : Rs 3,500–Rs 5,000 per sq ft.
This range may accommodate more complex architecture, improved glazing, natural stone or premium façade materials, higher-grade flooring and sanitary fittings, layered lighting, enhanced MEP systems and a greater level of customised detailing.
• High-specification luxury villa: approximately : Rs 5,000–Rs 7,500+ per sq ft.
Projects can enter this range when they include imported or highly customised finishes, large premium glazing systems, extensive fixed interiors, sophisticated air-conditioning and automation, specialist lighting, acoustic treatments or unusually complex architectural and structural features.
These bands should generally be treated as construction-planning figures rather than complete ownership costs. Unless specifically included, land, professional fees, statutory approvals, development charges, taxes, utility connections, loose furniture, appliances, artwork, premium landscaping, a lift, swimming pool, solar system and contingency may require separate budgets.
Rates also change with soil conditions, accessibility, project size, number of floors, construction duration, material-price movement and the quality of supervision. A detailed estimate should therefore be prepared after the concept design, area statement and outline specifications have been approved.
Calculate Cost on Built-Up Area, Not Plot Size
The plot area does not directly represent the area that will be constructed. A 3,000 sq ft plot may accommodate a much smaller or larger total built-up area depending on permissible ground coverage, setbacks, the number of floors, balconies, terraces, parking and the approved development regulations.
For budgeting, the design team should prepare an area statement for every floor. It should clearly identify enclosed rooms, walls, staircases, shafts, balconies, covered parking, terraces, double-height spaces and other chargeable areas. The basis used by the contractor must match this statement.
For example, a villa with 3,500 sq ft of total built-up area budgeted at Rs 4,000 per sq ft indicates a preliminary construction value of approximately Rs 1.40 crore. This is only the starting construction figure. Items excluded from the rate—such as professional fees, approvals, a lift, landscaping, loose furniture, appliances and contingency—must then be added separately.
Compact planning can often provide better value than unnecessary area. Corridors, oversized rooms and poorly used circulation increase the structure, flooring, ceilings, air-conditioning, lighting and maintenance costs. A carefully planned 3,500 sq ft villa may therefore feel more luxurious and function better than a poorly organised 4,500 sq ft home.
Before applying any per-square-foot rate, confirm the approved built-up area and the method by which balconies, terraces, double-height zones and external structures will be measured. Otherwise, the apparent rate may be accurate while the total budget remains misleading.
Structure and Civil Construction Form the Cost Foundation
The structure and civil works establish the villa’s safety, durability, geometry and ability to support every later finish. This scope typically includes excavation, foundations, reinforced-concrete work, masonry, plaster, screeds, basic waterproofing and other permanent building elements.
Cost depends heavily on soil conditions, foundation design, structural spans, floor heights and architectural complexity. Double-height spaces, large column-free rooms, cantilevers, extensive terraces, heavy stone cladding, rooftop pools and future expansion provisions may require additional steel, concrete, formwork and engineering.
A soil investigation and project-specific structural design should be completed before the budget is finalised. Assuming a standard foundation without understanding the site can produce a misleading estimate, particularly where filling, weak soil, groundwater, neighbouring structures or restricted access affects the construction method.
Civil specifications must also define concrete grades, reinforcement standards, wall materials, plaster systems, waterproofing details, curing and testing requirements. Reducing quality in concealed work may lower the initial quotation, but failures in structure, waterproofing or masonry are among the most disruptive and expensive problems to correct later.
The budget should therefore protect structural integrity and workmanship before increasing expenditure on decorative finishes. Marble, lighting and furniture can be upgraded in the future; foundations, slabs, drainage levels and concealed waterproofing cannot be replaced easily once the villa is occupied.
Façades, Windows and External Finishes Can Change the Budget Quickly
The exterior of a luxury villa can represent a substantial part of the construction budget. Large glazed openings, natural stone, aluminium screens, metalwork, specialised coatings, deep projections and complex architectural details cost more than a simple plastered and painted façade.
Window cost depends on the total glazed area, frame system, glass specification, opening type, hardware, insect screens and installation details. Large panels may require stronger profiles, thicker or laminated glass, specialised lifting equipment and more precise waterproofing. High-performance glazing can increase the initial cost but may reduce heat gain, glare, noise and long-term air-conditioning demand.
Cladding must be budgeted as a complete installed system. The stone, aluminium or wood-finish panel is only one component; supporting frameworks, anchors, adhesives, joints, sealants, flashings, corner details, scaffolding and skilled installation also affect the final cost. Complex combinations of several materials usually increase both labour and wastage.
External finishes in Lucknow must withstand strong sun, dust, temperature variation and monsoon rain. Selecting materials only for visual impact may create recurring cleaning, sealing, fading or leakage expenses. Maintenance access should therefore be considered at the design stage, especially for high façades and large windows.
An effective façade budget prioritises orientation, shading, weather resistance and durable junctions before decorative complexity. A restrained composition using fewer, well-detailed materials can often look more refined—and perform better—than an expensive elevation assembled from too many finishes.
MEP Systems Determine Comfort and Long-Term Operating Cost
Mechanical, electrical and plumbing systems may be less visible than stone or furniture, but they determine how comfortably, safely and efficiently the villa operates. Their cost depends not only on the number of points and fixtures, but also on system capacity, controls, redundancy, energy performance and maintenance access.
The electrical budget should account for sanctioned load, distribution panels, cabling, earthing, surge protection, backup power, lighting controls, air-conditioning, pumps, kitchens, a lift, solar integration, electric-vehicle charging and future automation. Decorative light fittings and imported controls may be priced separately from the basic electrical installation.
Plumbing costs are influenced by the number of bathrooms and kitchens, pipe specifications, pumps, water storage, pressure systems, hot-water generation, filtration, rainwater management and wastewater arrangements. Premium sanitary fittings can increase the budget considerably, but reliable concealed piping, accessible valves and correctly designed drainage remain the higher priorities.
Air-conditioning should be selected through a proper heat-load assessment. Individual split units, ducted systems, VRF systems, fresh-air provisions and humidity control have different capital, ceiling-space and maintenance implications. Large glass areas and inadequate shading can increase both equipment capacity and future electricity consumption.
Security, networking, intercom, CCTV, access control, audio-visual systems and home automation should be coordinated with the electrical design rather than added after construction. Even when every system is not installed immediately, providing suitable conduits, spaces and electrical capacity can make future upgrades far less disruptive.
The cheapest MEP proposal is not always the lowest-cost solution over the life of the villa. Efficient equipment, logical zoning, accessible services and dependable installation may require greater initial investment but can reduce energy use, breakdowns and destructive repairs.
Interior Finishes, Kitchens and Fixed Woodwork Need Separate Control
Interior costs can vary more widely than structural costs because they are strongly influenced by personal taste, material selection and the amount of customisation. Flooring, ceilings, wall finishes, doors, sanitary fittings, lighting, kitchens, wardrobes and fixed furniture should therefore be tracked as individual packages rather than absorbed into one vague “luxury finish” allowance.
Natural stone, large-format tiles, wooden flooring, decorative plaster, wall panelling and customised metalwork have different material, installation and maintenance requirements. The budget must include substrate preparation, adhesives, polishing, edge details, wastage, protection and specialist labour—not merely the showroom price of the visible material.
Kitchens require particular attention. Cabinet construction, shutters, hardware, countertops, sinks, faucets, internal accessories, lighting and appliances may be supplied by different vendors. A display kitchen, utility kitchen, pantry and separate preparation area can collectively become a major cost package even when each space appears modest.
Wardrobes and fixed furniture should be estimated from approved designs, dimensions and material specifications. The cost changes significantly with plywood or board grade, veneer, laminate, lacquer, glass, metal, hardware, internal accessories and the complexity of the joinery. A simple rate per square foot of room area is rarely adequate.
Loose sofas, dining furniture, beds, mattresses, rugs, curtains, artwork and decorative accessories are often excluded from construction and interior quotations. Homeowners should maintain separate budgets for fixed interiors and movable furnishings so that the villa is not structurally complete but financially unprepared for occupation.
Early mock-ups, material schedules and room-by-room estimates help control interior spending. Concentrating premium materials in high-impact locations while using durable, restrained finishes elsewhere can create a more coherent luxury experience without unnecessary expenditure.
Lifts, Pools, Solar and Automation Should Be Separate Cost Packages
Specialised features can add substantial value to a villa, but their cost is difficult to represent accurately within a general per-square-foot rate. Each system should have its own design brief, quotation, exclusions, installation requirements, warranty and maintenance plan.
A home elevator budget should include more than the lift equipment. The shaft or supporting structure, pit or platform requirements, electrical supply, ventilation, finishing around openings, transport, installation, statutory requirements and annual maintenance may all affect the total cost. Planning the lift during the architectural and structural stages is usually more economical than adding it later.
A swimming pool requires structural design, waterproofing, filtration, circulation, electrical equipment, lighting, drainage, safety provisions and surrounding deck finishes. Heating, covers, automation and landscaping can increase both the initial budget and continuing maintenance expense.
A solar-power package should define system capacity, panels, inverters, mounting structures, cabling, safety devices, monitoring, battery storage where required and coordination with the electrical distribution system. The roof must also retain suitable access for cleaning, inspection and future replacement.
Home automation may range from selected smart switches and security controls to an integrated system managing lighting, curtains, air-conditioning, access, entertainment and energy monitoring. Wiring architecture, compatible equipment, programming, commissioning and long-term technical support should be considered before selecting the system.
Treating these elements as separate packages makes the budget easier to understand and adjust. If funds become constrained, some systems can be installed in phases—provided that the structure, conduits, power supply and spatial provisions are incorporated from the beginning.
Professional Fees, Approvals and Statutory Charges Are Real Project Costs
A professionally designed villa requires more than a contractor and a set of floor plans. Depending on the project, the team may include an architect, structural engineer, MEP consultants, interior designer, landscape designer, lighting specialist, façade consultant, quantity surveyor and project-management or site-supervision professionals.
Professional fees should be evaluated according to the services and deliverables provided. Concept design, approval drawings, detailed working drawings, structural design, coordinated MEP layouts, interior documentation, specifications, tendering, cost control and site inspections represent different levels of involvement. A low design fee may exclude the documentation and supervision needed to prevent expensive construction errors.
Pre-construction investigations may include a site survey, soil testing, title-related professional advice and verification of applicable development controls. Statutory expenditure may include plan sanction, development charges, scrutiny fees, labour-related compliance, utility connections and other authority requirements applicable to the plot and project.
Taxes must also be clarified in every appointment letter, consultancy agreement, contractor proposal and supplier quotation. A price stated without taxes can make the initial budget appear lower than the amount ultimately payable.
Government fees and approval requirements can change, and they may vary with plot location, land use, built-up area and the approving authority. These amounts should therefore be verified from the relevant authority or qualified professional when the project begins rather than copied from an older estimate.
Good professional coordination does add to the initial budget, but it can reduce redesign, site conflicts, waste, delays and uncontrolled variations. For a luxury villa, design and supervision should be treated as cost-management tools—not merely additional expenses.
External Works and Landscaping Are Often Underestimated
The construction budget does not end at the villa’s exterior walls. Boundary walls, entrance gates, guard rooms, driveways, covered parking, pathways, external steps, service yards, stormwater drainage, utility trenches, outdoor lighting and site-level adjustments can together form a substantial cost package.
Site conditions strongly influence this expenditure. A plot requiring extensive filling, retaining walls, soil stabilisation, dewatering or difficult connections to roads, sewers and utilities will cost more to develop than a level, easily accessible site. These requirements should be investigated before the main construction budget is finalised.
External works do not necessarily increase in proportion to the villa’s built-up area. A compact house on a large plot may require more boundary treatment, paving, drainage and landscaping than a larger house on a smaller site. Estimating them only through the building’s per-square-foot rate can therefore leave a significant gap.
Landscaping should include more than the purchase of plants. Soil preparation, grading, irrigation, drainage, lawns, trees, planting beds, landscape lighting, water features, garden structures and initial maintenance all affect the completed cost. Mature trees, specialised planting and extensive hard landscaping can increase it further.
The landscape design must also coordinate with waterproofing, underground services, finished levels and rainwater movement. Planning these elements early protects the villa from water accumulation, damaged paving, obstructed services and expensive alterations after construction.
A separate external-development and landscaping budget gives homeowners better control over priorities. Essential drainage, access and boundary works can be protected first, while selected decorative landscape features may be completed in phases if necessary.
Costs Commonly Excluded from Turnkey Quotations
The word “turnkey” can create the impression that every item required for occupation is included. In practice, its meaning varies between contractors. A proposal may cover the main building works while excluding several professional, statutory, external and owner-selected packages.
Common exclusions may include:
• Cost of land and its registration
• Architectural, structural, MEP, interior and landscape-design fees
• Site surveys, soil testing and specialist consultancy
• Approval fees, development charges, utility deposits and statutory expenses
• Applicable taxes unless clearly stated
• Boundary walls, gates, guard rooms, driveways and external paving
• Landscaping, irrigation, outdoor lighting and water features
• Lifts, swimming pools, solar-power systems and home automation
• Air-conditioning equipment, decorative lighting and imported controls
• Modular kitchens, wardrobes and other fixed furniture
• Loose furniture, curtains, rugs, artwork and decorative accessories
• Kitchen appliances, televisions and audio-visual equipment
• Borewells, water-treatment systems, generators and battery backup
• Unusual foundations, retaining structures or additional work caused by difficult soil
• Price escalation, design changes and contingency
Some proposals include allowances for tiles, sanitary fittings, doors, hardware, kitchen work or electrical fixtures. These allowances are not the same as fixed specifications. If the selected products exceed the stated allowance, the difference becomes an additional cost. The quotation should explain whether wastage, transport, installation, taxes and contractor overheads are included within each allowance.
Homeowners should request a written inclusion-and-exclusion schedule alongside the bill of quantities. Every package should identify its brand or performance standard, quantity, unit rate, installation responsibility, tax treatment and procedure for approving variations.
The most reliable comparison is therefore not between two headline per-square-foot rates. It is between two clearly defined scopes. A higher quotation with coordinated drawings, dependable specifications, supervision, testing and fewer exclusions may ultimately cost less than a lower quotation followed by repeated additions.
Sample Budgets for 2,500, 3,500 and 5,000 Sq Ft Luxury Villas
The following examples apply the broad 2026 construction-planning ranges discussed earlier to the total built-up area. They are intended to illustrate scale, not replace a project-specific estimate.
2,500 sq ft villa
• Premium architectural construction at Rs 2,800–Rs 3,500 per sq ft: approximately Rs 70 lakh–Rs 87.5 lakh
• Luxury villa construction at Rs 3,500–Rs 5,000 per sq ft: approximately Rs 87.5 lakh–Rs 1.25 crore
• High-specification luxury construction at Rs 5,000–Rs 7,500+ per sq ft: approximately Rs 1.25 crore–Rs 1.88 crore+
3,500 sq ft villa
• Premium architectural construction at Rs 2,800–Rs 3,500 per sq ft: approximately Rs 98 lakh–Rs 1.23 crore
• Luxury villa construction at Rs 3,500–Rs 5,000 per sq ft: approximately Rs 1.23 crore–Rs 1.75 crore
• High-specification luxury construction at Rs 5,000–Rs 7,500+ per sq ft: approximately Rs 1.75 crore–Rs 2.63 crore+
5,000 sq ft villa
• Premium architectural construction at Rs 2,800–Rs 3,500 per sq ft: approximately Rs 1.40 crore–Rs 1.75 crore
• Luxury villa construction at Rs 3,500–Rs 5,000 per sq ft: approximately Rs 1.75 crore–Rs 2.50 crore
• High-specification luxury construction at Rs 5,000–Rs 7,500+ per sq ft: approximately Rs 2.50 crore–Rs 3.75 crore+
These figures represent preliminary construction values. They do not automatically include land, professional fees, statutory charges, taxes, external development, landscaping, loose furniture, appliances, lifts, pools, solar systems or contingency.
Two villas of the same built-up area may still have very different budgets. Structural complexity, floor heights, façade design, glazing, interior specifications, MEP systems, site conditions and customised features can move a project from one band to another.
A homeowner should therefore use these examples to establish an initial financial framework, then replace them with a detailed estimate once the concept design, area statement, specifications and major special packages have been defined.
Contingency, Escalation and Cash-Flow Planning
Even a carefully planned villa requires a contingency provision. Concealed site conditions, necessary design refinements, minor quantity variations and coordination issues may arise during construction. Depending on the completeness of the drawings, specifications and investigations, a preliminary contingency of approximately 5–10 per cent of the defined project cost may be considered.
Contingency should not become a fund for optional upgrades. A necessary change caused by an unforeseen condition is different from choosing more expensive marble, enlarging the glazing or adding another feature. Recording these separately helps the homeowner understand whether the project has encountered an unavoidable variation or a deliberate increase in scope.
Price escalation also requires attention, particularly where construction extends over several seasons. Steel, cement, aluminium, copper, labour, fuel, imported products and specialist equipment may change in price between budgeting, ordering and installation. The contract should explain which rates are fixed, how long quotations remain valid and how any permitted escalation will be calculated.
Early selection and timely procurement of long-lead items can reduce both delay and price uncertainty. Windows, lifts, air-conditioning equipment, imported fittings, customised doors, lighting controls, kitchen hardware and specialist façade materials may need to be ordered well before installation.
Cash-flow planning is as important as the total budget. Payments should be linked to clearly defined construction milestones, measured work or verified deliveries rather than dates alone. The homeowner should also understand when large payments for structure, windows, MEP equipment, interiors and special packages are likely to overlap.
A month-by-month cash-flow forecast allows funds to be arranged without interrupting construction. It should be updated whenever the programme, scope or procurement strategy changes. Maintaining the approved contingency separately from routine payment funds helps prevent it from being consumed too early.
Good financial control does not mean choosing the cheapest option at every stage. It means protecting essential quality, anticipating expenditure and making informed adjustments before commitments become difficult or expensive to reverse.
How to Compare Contractor Quotations Correctly
Contractor quotations should be compared only after each bidder has received the same drawings, area statement, specifications, bill of quantities and schedule of requirements. If the information issued to each contractor is different, the resulting prices cannot be compared reliably.
Place the proposals side by side and check the following:
• Built-up area and method of measuring balconies, terraces, shafts, double-height spaces and covered parking
• Scope of structural, civil, waterproofing, façade, MEP and finishing works
• Concrete grades, reinforcement standards, wall systems and waterproofing specifications
• Brands, models, performance standards and allowances for visible materials
• Quantities, unit rates and treatment of wastage
• Windows, doors, hardware, sanitary fittings and electrical accessories
• Air-conditioning, lighting, security, networking and automation provisions
• Kitchens, wardrobes, fixed furniture and other interior packages
• External works, landscaping and utility connections
• Professional fees, approvals, taxes and statutory charges
• Temporary works, scaffolding, testing, cleaning and debris removal
• Project duration, payment milestones and price-escalation conditions
• Defect-liability obligations, warranties and after-completion support
• Exclusions, provisional sums and owner-supplied items
• Procedure for valuing design changes and additional work
A quotation containing many provisional sums or undefined allowances may appear competitive while transferring cost uncertainty to the homeowner. These amounts should be reviewed against realistic selections before the contractor is appointed.
The contractor’s capability is equally important. Homeowners should review completed projects, current sites, financial and organisational capacity, quality-control systems, safety practices, supervision arrangements and references from previous clients. The team proposed for the project should also be identified.
Unusually low prices require careful investigation. They may result from genuine efficiency, but they may also indicate missing scope, unrealistic quantities, inferior specifications, insufficient supervision or the expectation of recovering margins through variations.
The preferred contractor should therefore offer the best balance of defined scope, competent execution, transparent pricing, realistic programme and dependable support—not merely the lowest initial total.
Luxury Villa Budget Checklist
Before approving the final budget or signing a construction contract, confirm the following:
• The ownership documents, site dimensions and applicable development controls have been verified
• A topographical survey and soil investigation have been completed where required
• The project brief defines the intended spaces, quality level, systems and special features
• Concept plans, elevations and the total built-up-area statement have been approved
• The measurement method for balconies, terraces, shafts, parking and double-height spaces is clear
• Structural, architectural and MEP designs are coordinated
• Outline specifications identify materials, brands or required performance standards
• The estimate is based on quantities and defined scope rather than one headline rate alone
• Façade, windows, glazing and waterproofing are fully considered
• Electrical load, backup power, air-conditioning, plumbing and water systems are planned
• Kitchens, wardrobes, fixed furniture and loose furnishings have separate budgets
• Lifts, pools, solar power, automation and other specialist systems are individually priced
• Boundary walls, gates, paving, drainage, landscaping and utility connections are included
• Professional fees, approvals, taxes and statutory charges are identified
• Every contractor quotation has a written inclusion-and-exclusion schedule
• Provisional sums and material allowances reflect realistic selections
• Payment milestones correspond with measured progress or verified delivery
• Price-escalation and variation procedures are defined in the contract
• Long-lead products have been identified and procurement dates planned
• A realistic contingency is retained separately from optional upgrades
• A cash-flow forecast covers the entire design, construction and completion period
• Testing, commissioning, warranties, documentation and defect rectification are included
• The completed villa’s maintenance and operating costs have been considered
This checklist should be reviewed whenever the design or specification changes. A decision that appears small in isolation—such as increasing glazed area, changing the air-conditioning system or adding another kitchen—can affect structure, services, finishes, programme and cost simultaneously.
The most dependable budget is therefore a coordinated working document rather than a one-time figure. It should develop with the design, record approved decisions and remain visible to the homeowner, consultants and contractor throughout the project.
Conclusion: Budget for Performance Before Decoration
The cost of building a luxury villa in Lucknow in 2026 cannot be reduced to one universal rate per square foot. The final investment depends on the built-up area, site conditions, architectural complexity, structural design, façade, MEP systems, interior scope, external development and the standard of execution.
The broad planning ranges in this chapter can help establish an initial direction, but a dependable budget requires a defined brief, coordinated drawings, an accurate area statement, written specifications and a detailed bill of quantities.
When funds are limited, priority should be given to the elements that are difficult or destructive to change later: structure, waterproofing, drainage, windows, concealed services, electrical capacity, plumbing and environmental performance. Decorative finishes, selected furniture and some specialist features can be upgraded or introduced in phases.
True luxury is not measured by the price of visible materials alone. It is reflected in comfortable spaces, durable construction, dependable systems, thoughtful detailing and lower long-term disruption. A villa that performs well every day provides greater value than one that spends heavily on decoration while compromising concealed quality.
For homeowners planning a luxury villa in Lucknow, Aurevia Luxury Villas can assist with project briefing, design coordination, budgeting, specification development, contractor comparison and construction planning before major financial commitments are made.
This chapter completes the Luxury Villa Trends 2026 series—a practical guide to creating villas that are refined, climate-responsive, future-ready and built around lasting quality.
Cost disclaimer: All figures stated in this article are broad preliminary planning ranges for Lucknow in 2026. They are not quotations or guarantees. Actual costs must be confirmed through site investigation, approved drawings, specifications, current supplier and contractor quotations, applicable taxes and statutory requirements.
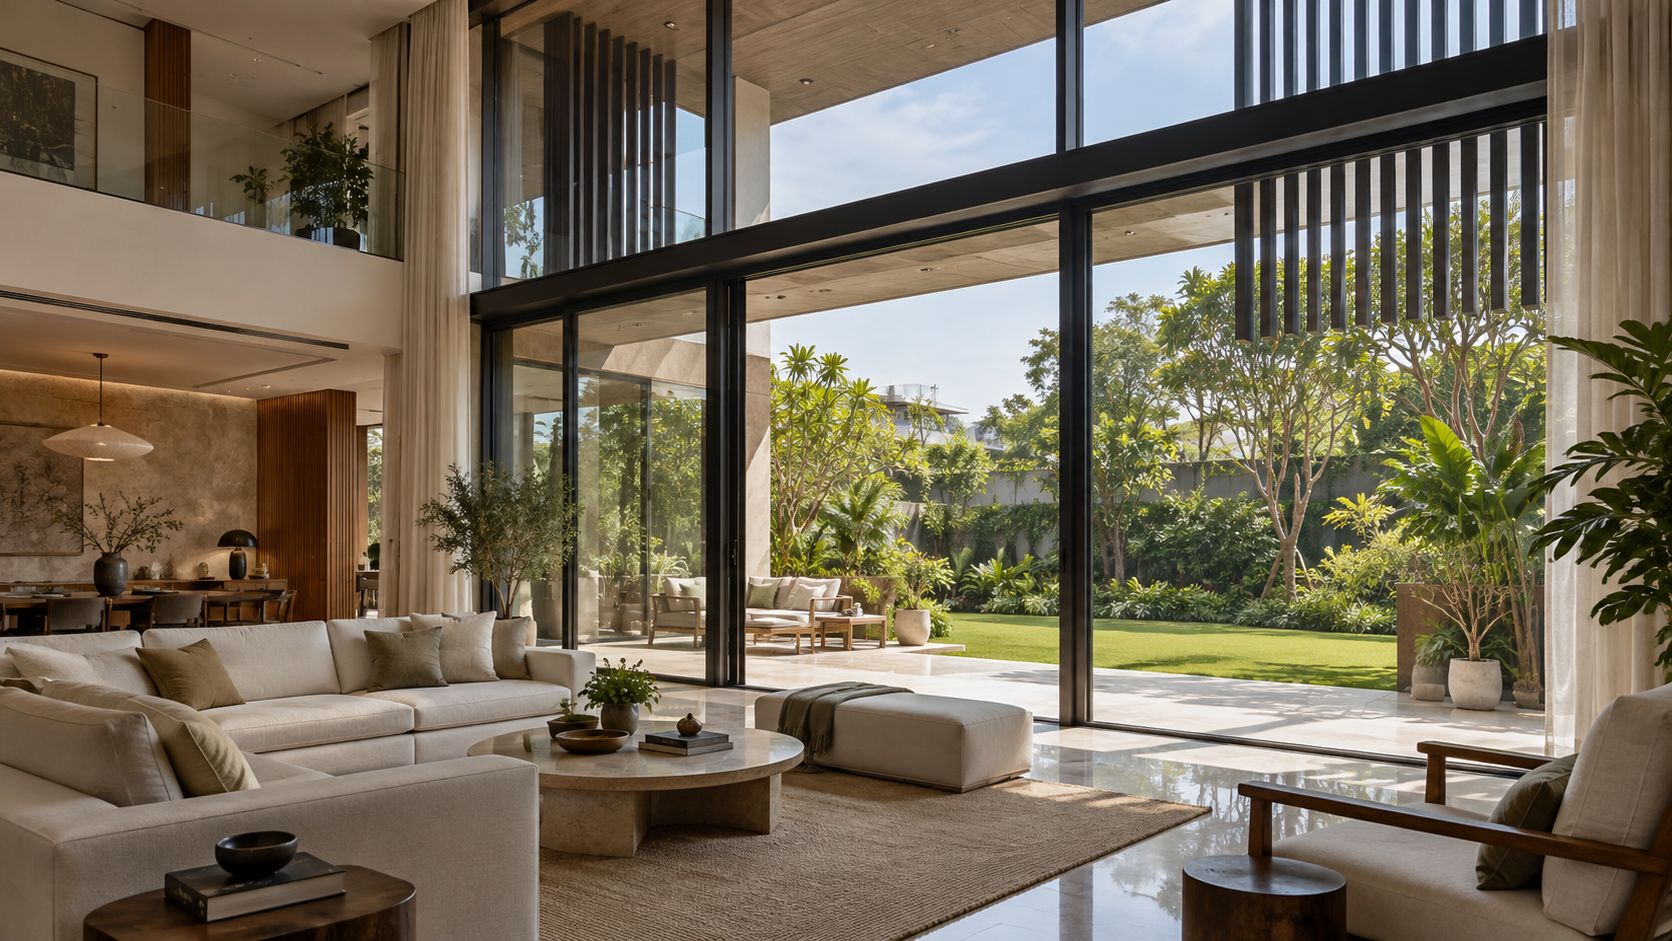
Large Glass Windows in Luxury Villas: Beautiful Feature or Expensive Mistake?
Are large glass windows right for a luxury villa in Lucknow? Explore orientation, glazing performance, shading, privacy, installation, safety and maintenance before approving expansive windows.
Large glass windows have become one of the most recognisable features of contemporary luxury villas. They bring daylight deep into the home, frame garden views and create a strong connection between indoor and outdoor spaces. Used well, they can make a room feel brighter, calmer and more spacious.
But glass that looks elegant in a design image may behave very differently in Lucknow’s climate. Intense summer sun, glare, dust, monsoon rain, privacy concerns and increased air-conditioning demand can turn an impressive feature into an expensive problem.
The real question is therefore not whether large windows are good or bad. It is whether their orientation, size, glass specification, frame, shading and maintenance access have been designed together. A successful glass façade begins with performance—not appearance alone.
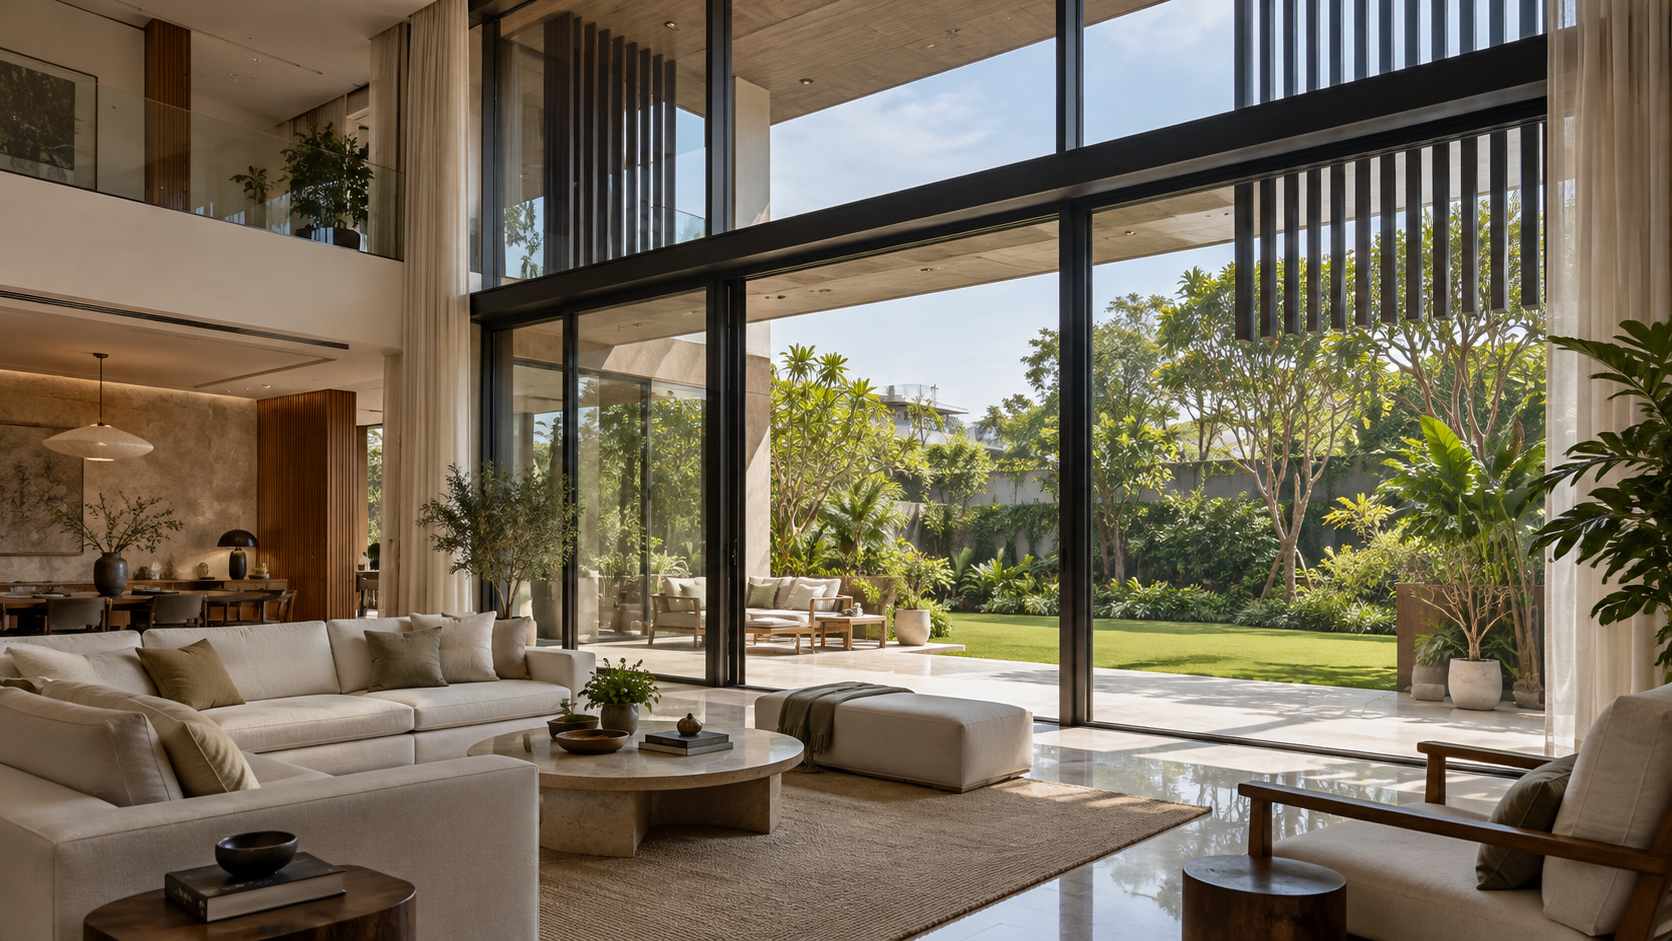
AI-generated concept illustrating climate-responsive large glazing, external shading and garden views. Not a photograph of a completed Aurevia project.
Start With Orientation, Not Window Size
A full-height window should never be approved only because it looks impressive on an elevation. The same glass area can perform very differently depending on whether it faces north, south, east or west.
North-facing glazing generally receives softer, more consistent daylight and is often easier to manage. East-facing windows admit pleasant morning light but may still need glare control. South-facing glass can work with correctly calculated horizontal shading, while west-facing glazing requires the greatest caution because low afternoon sun is difficult to block and can create intense heat and glare.
Before deciding the size of a window, map the direction of the sun, neighbouring buildings, garden views, road exposure and privacy. The architecture should place larger openings where daylight and views justify them, while reducing or protecting glass on difficult façades.
Choose Glass by Performance, Not by Name
“Toughened glass,” “laminated glass,” “double glazing” and “Low-E glass” describe different properties. One term cannot substitute for another, and a window may need a combination of them.
Toughening improves resistance to impact and thermal stress and changes how the glass breaks. Laminated glass holds fragments together after breakage and may be appropriate where fall protection, overhead glazing, security or post-breakage retention is important. An insulated glass unit uses two or more panes separated by a sealed cavity to improve thermal and, depending on its construction, acoustic performance. A Low-E coating helps control heat transfer, but its performance depends on the coating type and where it is placed within the assembly.
Ask for three key values when comparing options:
• Solar Heat Gain Coefficient (SHGC): how much solar heat passes through the window. A lower value generally provides better solar control.
• U-value: how readily heat passes through the complete window assembly. A lower value indicates better insulation.
• Visible Light Transmittance (VLT): how much daylight enters. Very low VLT may reduce glare but can also make interiors darker and alter colours.
These values should be reviewed together. The lowest SHGC or darkest-looking glass is not automatically the best choice. The architect, façade consultant and air-conditioning designer should select an appropriate balance for each orientation, room and window size.
The Frame and Installation Matter as Much as the Glass
High-performance glass cannot compensate for a weak frame, poor hardware or careless installation. Large panes are heavy, and their frames must be engineered for the glass size, wind pressure, opening type and structural movement expected at the location.
Slim aluminium profiles may look elegant, but appearance alone does not confirm their suitability. Ask for the exact system, profile series, wall thickness, reinforcement, hardware capacity, surface finish and tested performance. Where improved thermal performance is required, a thermally broken frame may be considered as part of the complete window specification.
For opening windows, good-quality gaskets, locking points and hardware help control air leakage, dust, noise and rain. Sliding systems are convenient and visually clean, but their drainage paths and interlocking details need particular attention. Fixed panes are generally easier to seal, although the room must still have an appropriate ventilation strategy.
Installation junctions should show how the frame connects to the wall, sill, lintel and waterproofing. Weep holes and drainage channels must remain clear, sealants must be compatible with adjoining materials, and sill details should direct rainwater away from the interior. Before approving all windows, test a full-size installed sample for operation, alignment, air leakage and water penetration.
Control the Sun Before It Reaches the Glass
High-performance glass can reduce solar heat gain, but external shading is often more effective because it intercepts direct sunlight before it reaches the window. Roof overhangs, balconies, recessed openings, pergolas, fins, screens and carefully placed trees can all contribute to solar control.
The shading design should respond to orientation. Horizontal overhangs are generally more useful against high-angle sun, while vertical fins or screens may help with low-angle morning and afternoon sun. A decorative projection should not be assumed to provide useful shading without checking the sun angles and the period during which protection is required.
Internal curtains, blinds and films can improve privacy and reduce glare, but solar heat has already entered the building by the time sunlight reaches them. They should complement the architectural shading strategy rather than replace it.
Large unshaded glazing can raise the cooling load, increase the required air-conditioning capacity and make areas near the window uncomfortable even when the room temperature appears acceptable. The HVAC designer should therefore receive the actual window sizes, orientations, glass performance values and shading details before equipment is selected. Oversized glass and undersized cooling are an expensive combination; so are oversized air conditioners chosen to compensate for an avoidable façade problem.
Daylight Without Glare, Exposure or Noise
More daylight is useful only when the room remains comfortable. Strong reflections on televisions, work surfaces and polished floors can make a bright space difficult to use. Furniture, artwork and fabrics may also fade when exposed to prolonged direct sunlight. Window placement, shading, glass selection and adjustable blinds should therefore be coordinated with the room layout.
Privacy also changes between day and night. Reflective or tinted glass may appear private during daylight, yet the effect can reverse after sunset when interior lights are switched on. Bedrooms, bathrooms and street-facing living areas need a deliberate privacy plan using landscape buffers, screens, curtains, blinds or partially obscured glazing where appropriate.
Large windows do not automatically provide good sound insulation. External noise depends on the full assembly: glass build-up, air gap, frame, seals, opening type and installation quality. Laminated glass or an appropriately designed insulated unit may improve acoustic performance, but the specification should respond to the actual noise source and frequency range.
Natural ventilation must also be planned independently of the visual composition. A façade made mainly of fixed glass may look clean but can leave the home dependent on mechanical cooling. Well-positioned operable sections, secure night ventilation and insect screens can make the villa more adaptable during suitable weather.
Plan for Safety, Cleaning and Replacement
Large glazing must be designed as a building component, not treated as decoration. Glass in doors, low-level panels, stair areas, balconies and other impact or fall-risk locations may require safety glazing. The appropriate glass composition, thickness, support and fixing method should be determined by qualified structural and façade professionals for the panel size and location.
Full-height transparent panels can also be difficult to notice. Visible markings or other design cues can reduce accidental collisions, particularly for children and older occupants. Where relevant, the design should also consider pets and the risk of birds striking highly reflective glazing.
Cleaning access should be resolved before construction. Upper-floor and double-height windows may require accessible balconies, opening sections, suitable anchor points or professional cleaning equipment. A dramatic window that cannot be reached safely will quickly become a maintenance burden.
Every component will eventually need attention. Gaskets, sealants, locks, rollers and insulated glass units can deteriorate or fail. The design team should confirm how damaged glass will be removed, transported and replaced without damaging finished interiors or landscaping. Access for lifting equipment may need to be preserved.
Before approving the system, request written warranties, cleaning guidance, maintenance intervals and replacement procedures for the glass, coating, frame, hardware and sealants.
Where Large Glass Works—and Where Restraint Is Wiser
Large windows work best where daylight, views and a connection to the landscape provide a clear benefit. Shaded garden-facing living rooms, dining spaces, courtyards and protected double-height areas can be suitable locations when the glazing, frame and external shading are properly designed.
Greater caution is needed on west-facing façades, exposed upper floors and rooms used during the hottest part of the day. Bedrooms may become uncomfortable if morning or afternoon sunlight is not controlled, while bathrooms and street-facing rooms require additional privacy planning.
Large glazing may also be unsuitable where neighbouring buildings are close, attractive views are absent or exterior cleaning and future replacement would be difficult. In these locations, a smaller, carefully positioned window may provide better daylight, privacy and comfort than an uninterrupted glass wall.
The strongest villa designs rarely use glass everywhere. A balanced façade can combine larger openings in selected areas with solid insulated walls, shaded windows and smaller operable sections elsewhere. This selective approach usually produces a more comfortable, private and visually refined home.
Large-Window Checklist for a Lucknow Villa
• Map the orientation, sun exposure, views, privacy and external noise for every proposed window.
• Confirm why each large opening is needed instead of approving glass only for appearance.
• Prepare a complete window schedule showing dimensions, opening type, glass composition, frame system, hardware and finish.
• Compare the Solar Heat Gain Coefficient (SHGC), U-value and Visible Light Transmittance (VLT) together.
• Confirm the required safety, impact, fall-protection and acoustic performance for each location.
• Coordinate roof overhangs, balconies, fins, screens and other external shading with the sun direction.
• Detail sill slopes, drainage channels, weep holes, flashings, sealants and waterproofing at every junction.
• Give the HVAC designer the actual window sizes, orientations and glass-performance values before selecting equipment.
• Plan operable sections, secure ventilation, insect screens, curtains, blinds and nighttime privacy.
• Confirm safe access for cleaning, inspection, maintenance and future glass replacement.
• Review warranties, test reports, maintenance requirements and the availability of replacement hardware and glass.
• Approve a full-size installed mock-up and test its operation, alignment, air leakage and water resistance before placing the complete order.
Large Windows Should Earn Their Place
Large glass windows are neither automatically luxurious nor inherently a mistake. Their success depends on whether orientation, window size, glass performance, frame design, external shading, installation, privacy, ventilation and maintenance have been considered as one coordinated system.
When these decisions are made early, large glazing can bring beautiful daylight, meaningful views and a stronger connection with the landscape without compromising comfort. When glass is selected mainly for appearance, the result may be glare, overheating, water leakage, reduced privacy and avoidable energy and maintenance costs.
A selective approach is usually the most refined. Place larger windows where they provide genuine value, protect them from difficult sun and rain, and use well-insulated solid walls elsewhere. In a well-designed luxury villa, every glass opening should earn its place.
Planning a new villa or upgrading an existing home in Lucknow? Aurevia Luxury Villas can help develop a coordinated window and façade brief that balances daylight, views, comfort, safety, energy performance and long-term care.
WhatsApp: 7838981189
Email: ashwini@aurevialuxuryvillas.com
Website: www.aurevialuxuryvillas.com
Final glass composition, thickness, frame system, fixings, structural support, safety provisions and façade details must be confirmed by qualified architects, structural engineers, façade specialists and manufacturers for the specific project.
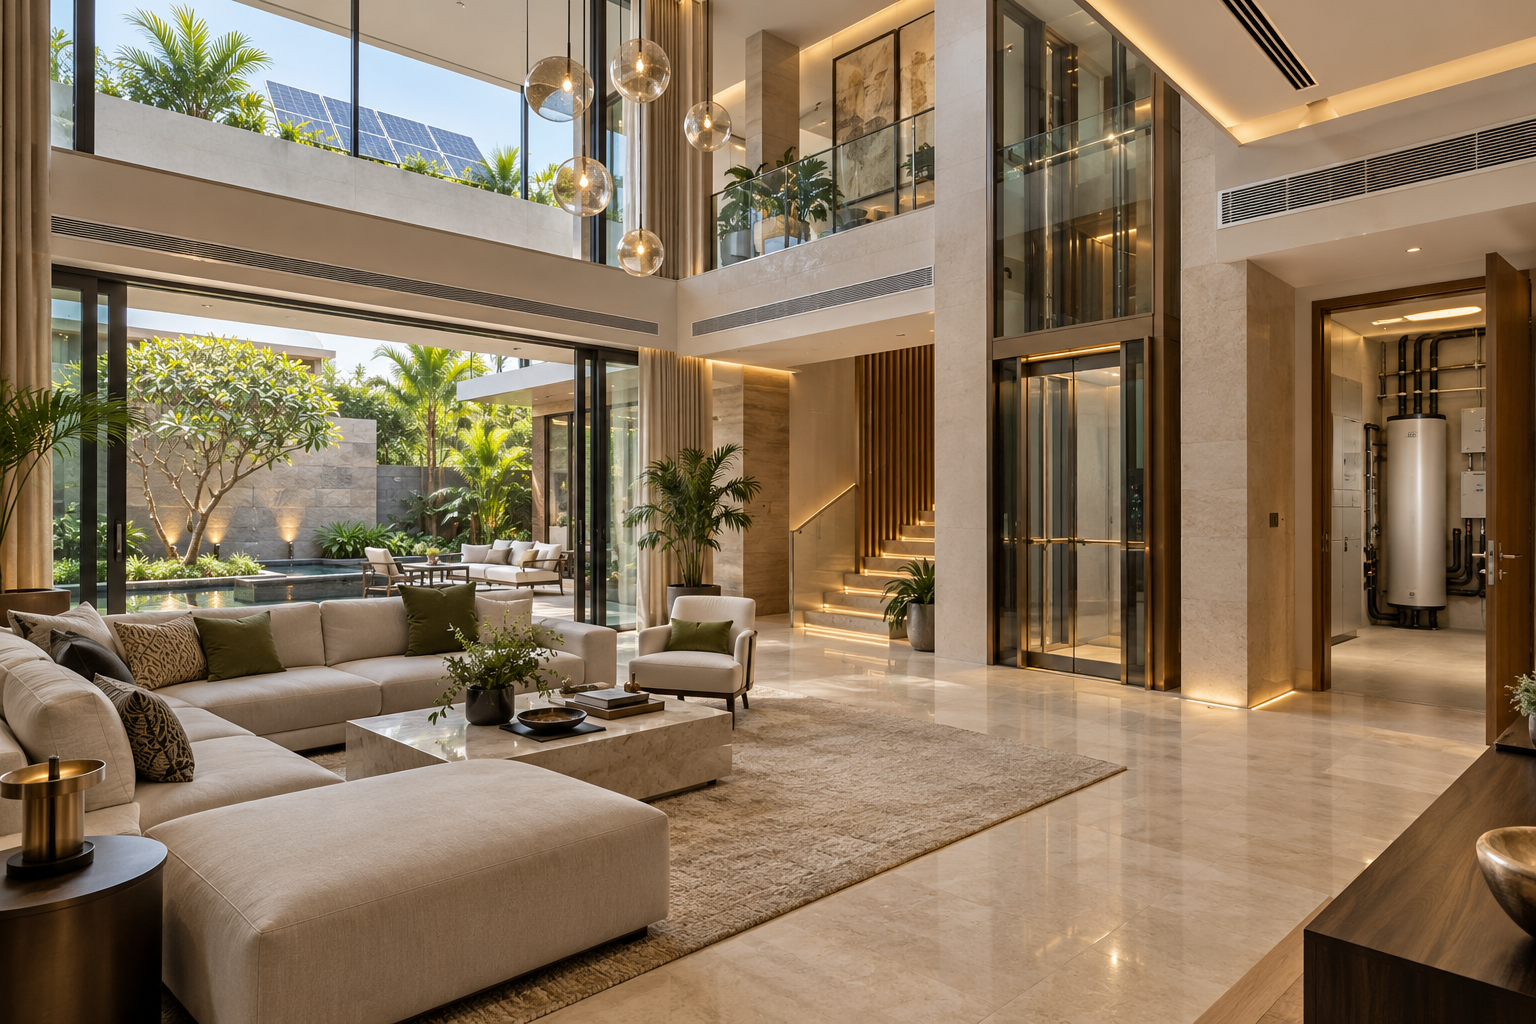
Energy-Efficient MEP Systems Every Luxury Villa Should Consider
Explore energy-efficient MEP systems for luxury villas, including efficient cooling, fresh-air ventilation, electrical safety, solar power, water conservation, smart monitoring and long-term maintenance.
Luxury in a modern villa is not defined only by visible finishes, spacious rooms or smart controls. It also depends on the unseen mechanical, electrical and plumbing systems that maintain comfort, indoor air quality, reliable power and efficient water use throughout the year.
In Lucknow’s climate—with intense summers, a humid monsoon and cool winters—poorly coordinated MEP services can cause high utility bills, uneven cooling, water wastage, noise and repeated maintenance. Planning these systems together during the design stage creates a villa that is more comfortable, economical, resilient and easier to operate over its lifetime.
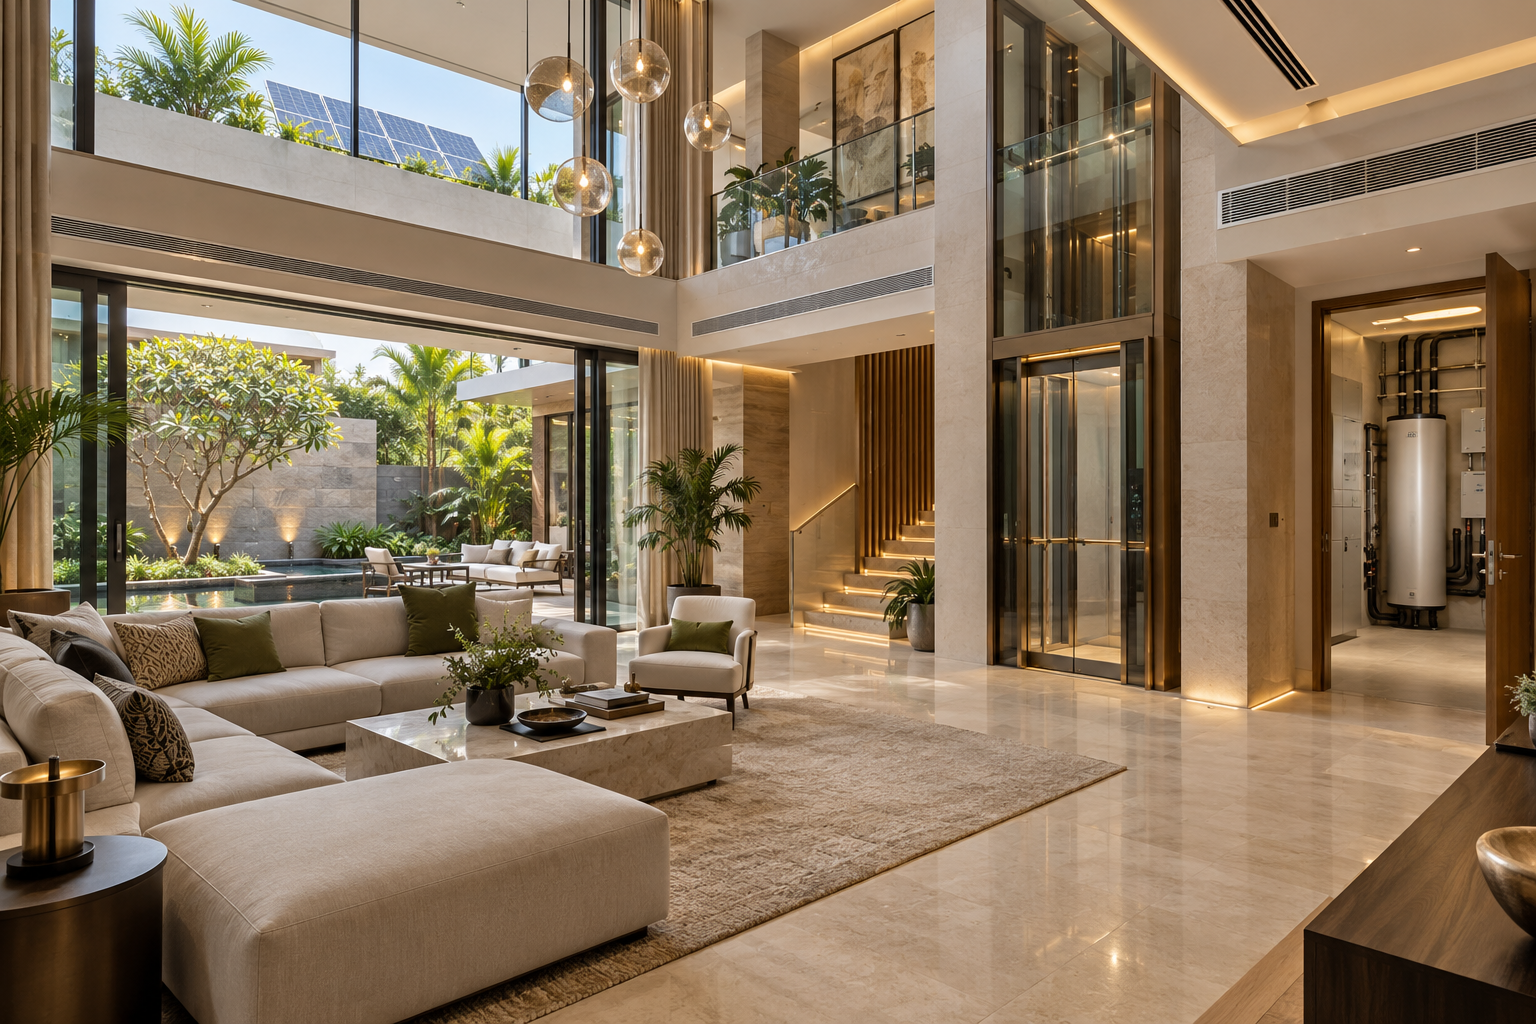
Energy-efficient luxury villa with integrated cooling, solar power, efficient lighting and organised building services. AI-generated concept image for design inspiration; not a completed project photograph.
Plan MEP as One Integrated System
Mechanical, electrical and plumbing services should be planned together with the architecture and structure—not fitted into leftover spaces after the layout is finalised. Early coordination determines plant-room locations, service shafts, ceiling depths, equipment access, drainage routes and future maintenance requirements.
Prepare coordinated MEP drawings and a realistic load schedule before construction begins. This helps prevent clashes between ducts, pipes, beams, lighting and false ceilings while reducing costly changes during execution. It also ensures that every system is correctly sized for the villa’s actual requirements rather than selected through guesswork.
Design Cooling Around Actual Heat Loads
Air-conditioning is usually the largest energy consumer in a luxury villa. Avoid choosing equipment only by room area or by increasing capacity “for safety.” Oversized units may cool quickly but cycle frequently, control humidity poorly and consume more power.
Ask the HVAC consultant to calculate room-by-room heat loads after considering orientation, glazing, insulation, occupancy, lighting and equipment. High-efficiency inverter split, ducted or VRF systems can then be selected according to the villa’s size, zoning and usage pattern.
Divide the villa into independently controlled zones so that unoccupied bedrooms, guest areas and formal spaces do not require continuous cooling. Keep outdoor units in ventilated, serviceable locations and provide proper condensate drainage, vibration isolation and access for filter cleaning and repairs.
Provide Fresh Air and Humidity Control
Cooling alone does not guarantee healthy indoor air. Airtight windows, powerful kitchen exhausts and continuously closed rooms can create stale air, odours, excess carbon dioxide and unwanted pressure differences.
Provide planned fresh-air ventilation for occupied rooms and effective exhaust for kitchens, bathrooms, utility areas and basements. Energy-recovery ventilation may be considered where operating patterns and project scale justify it. During the monsoon, proper humidity control helps reduce condensation, mould and the discomfort of a cold but clammy interior.
Use accessible, high-quality filters suited to local dust conditions, and locate fresh-air intakes away from roads, generator exhausts, plumbing vents and outdoor-unit discharge. Indoor-air-quality sensors can monitor parameters such as carbon dioxide, particulate matter, temperature and humidity, but they should support—not replace—good ventilation design and regular maintenance.
Build a Safe and Future-Ready Electrical System
Begin with a detailed electrical load schedule covering air-conditioning, kitchens, water heaters, pumps, lifts, electric-vehicle charging, landscape services, security systems and other major equipment. Apply realistic diversity so that the sanctioned load, transformer or generator is neither inadequate nor unnecessarily oversized.
Provide separate, clearly labelled circuits for lighting, sockets and major appliances, with accessible distribution boards arranged by floor or functional zone. Use correctly rated cables and protective devices, reliable earthing, residual-current protection, surge protection and lightning protection as required by the project and applicable standards.
Reserve spare ways in distribution boards, suitable conduits and capacity for future solar power, battery storage, automation, additional air-conditioning and EV charging. A well-documented single-line diagram and circuit schedule will make future testing, fault-finding and expansion considerably easier.
Use Efficient Lighting and Sensible Controls
Specify efficient LED luminaires with appropriate output, colour temperature, colour quality and glare control instead of judging fixtures only by wattage. Coordinate lighting with daylight, furniture, artwork and ceiling design so that fewer, well-positioned fittings can provide both ambience and useful illumination.
Use layered lighting circuits for ambient, task, accent and decorative lighting. Occupancy sensors are useful in stores, dressing rooms, passages and utility areas, while daylight sensors and timers can reduce unnecessary operation of exterior and landscape lighting.
Scene controls can simplify daily use, but essential lights should remain operable through familiar wall switches. Select replaceable, locally serviceable drivers and fittings wherever practical; an efficient system loses its value if a minor component failure requires replacing an entire decorative fixture.
Plan Solar Power and Backup Around Priorities
A rooftop solar system can offset daytime consumption from air-conditioning, pumps, appliances and common-area loads. Its capacity should be based on usable, shadow-free roof area, structural suitability, electricity-consumption patterns and the applicable utility requirements—not simply the largest system that fits.
Designate safe, ventilated and serviceable locations for inverters, protection equipment and any future battery storage. Coordinate cable routes, earthing, lightning protection, isolation and monitoring from the beginning, even if installation will be completed later.
Separate essential and non-essential loads before sizing backup power. Security, internet, selected lighting, refrigeration, water pumps, medical equipment and lift-rescue functions may require priority, while high-demand appliances can remain excluded. This approach reduces generator or battery size, fuel use, noise and operating cost while maintaining essential comfort and safety.
Design Plumbing for Efficiency and Easy Maintenance
Estimate water demand realistically and divide the system into clearly identified cold-water, hot-water, flushing, irrigation and treated-water networks where applicable. Select efficient fixtures that reduce consumption without compromising the experience expected in a luxury villa.
Use correctly sized pipes, pressure zones and efficient variable-speed pumps where suitable. Excessive pressure wastes water, creates noise and shortens the life of fittings, while insufficient pressure produces an equally poor result. Provide accessible isolation valves so that one bathroom or zone can be repaired without shutting down the entire house.
Plan drainage slopes, traps, vents, cleanouts and access points carefully before construction. Install leak sensors near tanks, pumps, water heaters, kitchens and concealed service areas, and consider automatic shut-off for critical locations. Separate meters or monitoring for major uses can reveal abnormal consumption before a hidden leak causes serious damage.
Reduce the Energy and Water Used for Hot Water
Hot-water systems should be sized according to actual occupancy, bathroom usage, kitchen demand and travel distance between the heater and fixtures. Oversized storage systems waste energy, while poorly located heaters cause residents to discard large quantities of water while waiting for it to become hot.
Consider solar water heating or efficient heat-pump water heaters where roof space, climate, maintenance support and usage patterns make them practical. Insulate hot-water pipes and storage tanks, and use controlled recirculation only where long pipe runs justify it. Recirculation pumps should operate through timers, occupancy logic or demand controls rather than continuously.
Capture Rainwater and Reuse Water Responsibly
Rainwater harvesting should be integrated with roof drainage, filtration, storage or groundwater-recharge arrangements according to site conditions and local requirements. Keep the system accessible for cleaning before and during the monsoon.
Where a treatment system is practical, treated wastewater can support flushing or landscape irrigation through a completely separate, clearly marked network. Reuse systems must be designed for water quality, odour control, safe storage and dependable maintenance; installing complicated equipment without an operating plan rarely produces lasting savings.
Use Smart Monitoring Without Creating Dependency
A simple energy-monitoring system can show total consumption and separate major loads such as cooling, hot water, pumps, EV charging and landscape services. Water-level, pump-status and leak alerts can also help identify abnormal operation before it becomes expensive.
Automation should make the villa easier—not harder—to operate. Choose systems with clear interfaces, local technical support and manual control for essential functions. Avoid locking basic lighting, cooling or water services behind a single app, internet connection or proprietary controller.
Commission, Document and Maintain Every System
Energy-efficient equipment cannot compensate for poor installation. Before handover, test electrical protection, earthing, water pressure, drainage, pump operation, HVAC performance, controls, backup changeover and every safety interlock under realistic conditions.
Obtain approved drawings, test reports, warranties, equipment schedules, operating instructions and maintenance contacts in both digital and printed form. Label valves, panels, circuits and service routes clearly, and establish a preventive-maintenance calendar for filters, pumps, tanks, solar equipment, batteries, generators and water-treatment systems.
Commissioning and documentation are not administrative extras. They convert coordinated design and quality equipment into reliable, measurable performance throughout the villa’s life.
Energy-Efficient Villa MEP Checklist
• Complete coordinated architectural, structural and MEP drawings before construction.
• Calculate room-by-room cooling loads and divide the villa into practical HVAC zones.
• Provide planned fresh air, exhaust, filtration and humidity control.
• Prepare a realistic electrical load schedule and clearly separate essential loads.
• Include proper earthing, residual-current protection, surge protection and lightning protection.
• Use efficient LED lighting with daylight, occupancy and timer controls where appropriate.
• Reserve roof space, conduits and electrical capacity for solar power and future batteries.
• Provide correctly sized water pipes, pressure zones, pumps and accessible isolation valves.
• Insulate hot-water systems and control any recirculation pump intelligently.
• Integrate rainwater harvesting and practical treated-water reuse where suitable.
• Provide energy, water-level, pump-status and leak monitoring without eliminating manual control.
• Test, label and document every system, and prepare a preventive-maintenance schedule before handover.
A High-Performance Villa Begins Behind the Finishes
The most successful energy-efficient villa is not defined by one premium product. It results from correctly sized systems, coordinated design, quality installation, simple controls and disciplined maintenance working together.
These decisions are most valuable when made before construction, while equipment spaces, service routes, electrical capacity and water networks can still be integrated without compromising the architecture.
Planning a new villa or upgrading an existing home in Lucknow? Aurevia Luxury Villas can help develop a coordinated MEP brief that balances comfort, efficiency, resilience and long-term serviceability.
WhatsApp: 7838981189
Email: ashwini@aurevialuxuryvillas.com
Website: www.aurevialuxuryvillas.com
Final system capacities and specifications should be confirmed by qualified architects, engineers and specialist consultants for the specific project.
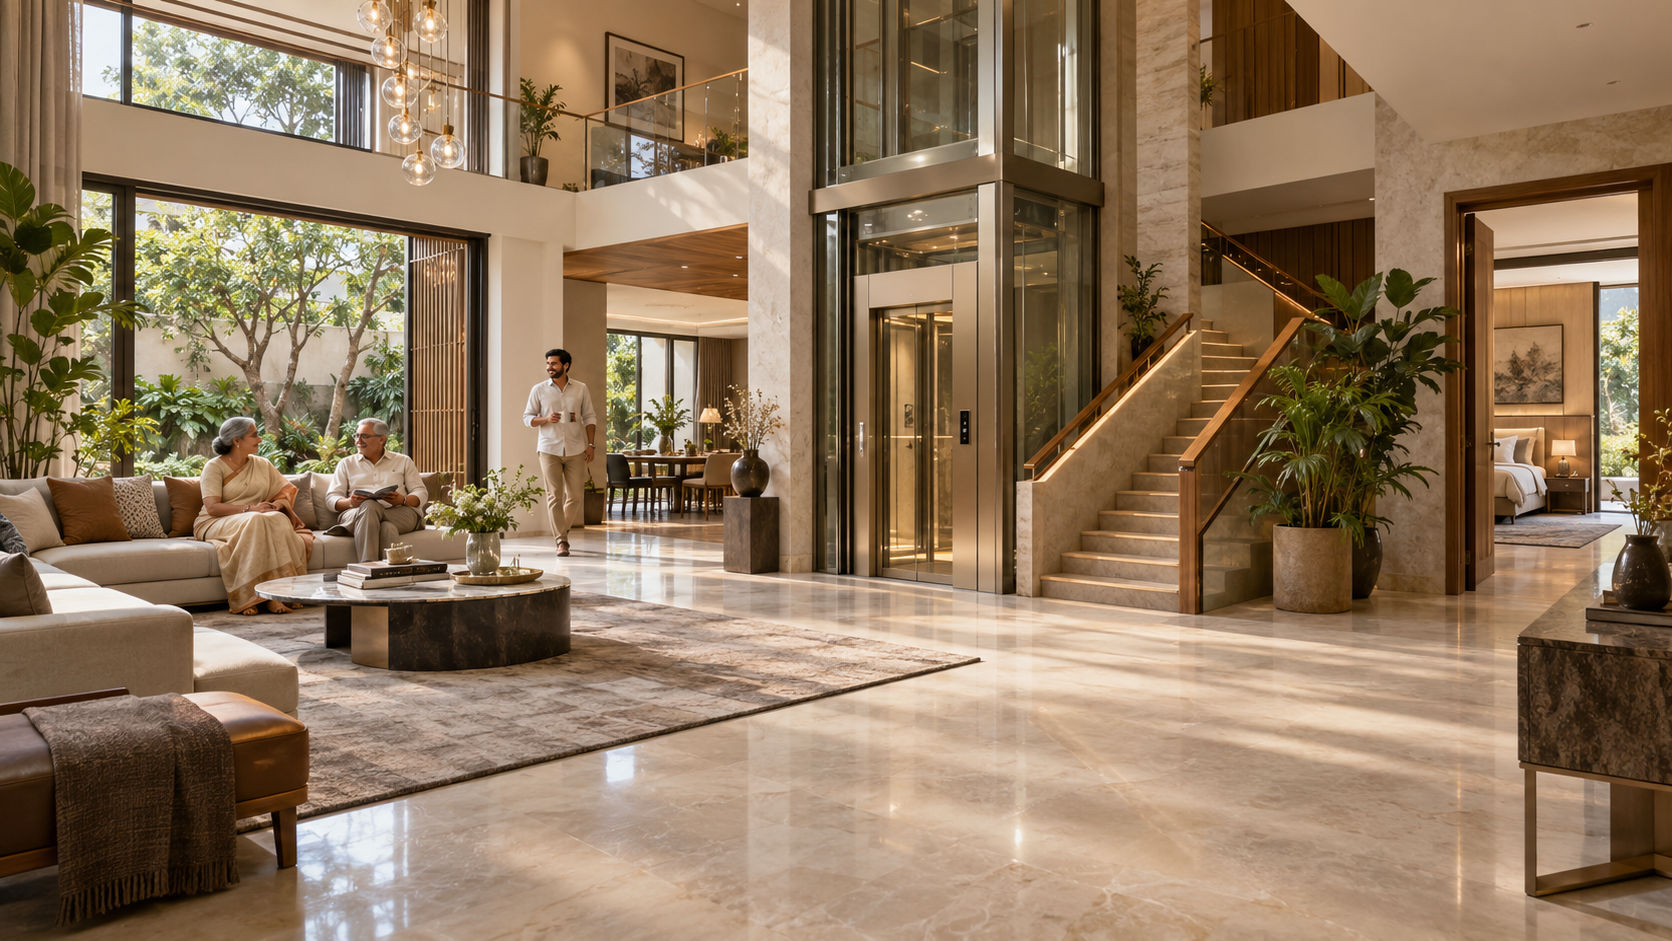
Future-Ready Villas: Planning for Home Elevators, Senior Living and Changing Families
Learn how to plan a future-ready luxury villa with provision for a home elevator, step-free circulation, senior-friendly rooms, safer bathrooms and flexible spaces for changing families.
A luxury villa should not serve only the household that moves into it today. It should continue to support its residents as parents grow older, children return or move away, mobility needs change and new generations begin sharing the home.
Future-ready planning does not mean making a villa look clinical or designing every space around ageing. It means quietly building adaptability into the architecture—from reserving space for a home elevator and creating step-free circulation to planning safer bathrooms, flexible bedrooms and dependable services. Decisions made during the initial design stage can make future alterations easier, less disruptive and more economical.
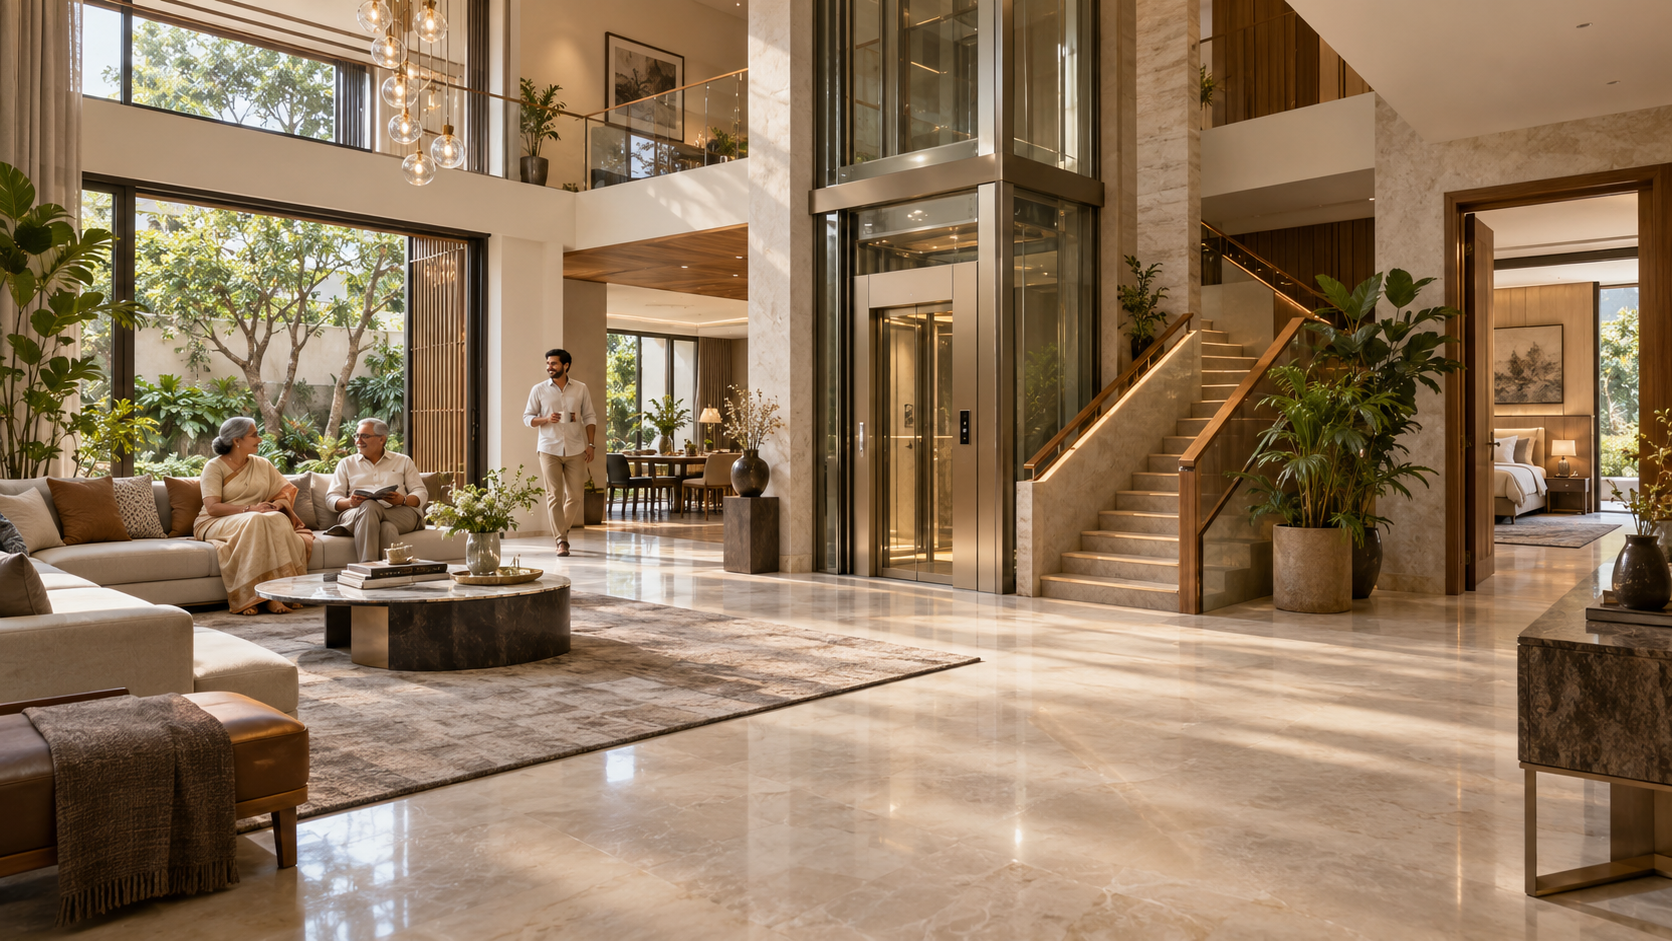
Future-ready luxury villa with an integrated home elevator, step-free circulation and secure staircase. AI-generated concept image for design inspiration; not a completed project photograph.
Start with a Long-Term Household Brief
Before drawing rooms or selecting an elevator, consider how the household may change over the next ten to twenty years. Will ageing parents live on the ground floor? Could an adult child return with a family? Might a bedroom later be needed for a caregiver, home office or rehabilitation?
These possibilities do not require rigid predictions. They require a plan with sensible flexibility: at least one accessible bedroom suite, convenient movement between essential spaces, sufficient privacy for different generations and rooms that can change purpose without major structural work. A thoughtful household brief becomes the foundation for every future-ready decision that follows.
Reserve the Home Elevator Before the Plan Is Fixed
A home elevator is easiest to accommodate when its location is established during the earliest planning stage—even if installation may happen years later. Reserving a suitable vertical zone on every floor can prevent the future loss of bedrooms, awkward circulation or expensive structural alterations.
The architect should coordinate the proposed lift with the structural engineer, electrical consultant and shortlisted lift manufacturer. Shaft dimensions, door positions, pit or ramp requirements, overhead clearance, load support, ventilation, power supply and emergency-rescue provisions vary by lift type and model. They should therefore be confirmed from current manufacturer drawings and applicable local requirements before construction.
The lift should open into a well-lit, accessible lobby rather than a narrow passage. It should connect the floors used for daily living and remain convenient for older residents, wheelchair users, luggage and household assistance. If installation is deferred, the reserved area can temporarily serve as storage or another carefully planned removable use.
Understand Lift Types and Their Trade-Offs
Home elevators use different drive systems and construction arrangements. Hydraulic lifts can offer smooth travel but may require dedicated equipment space and careful maintenance. Traction or machine-room-less systems can suit multistorey homes, although shaft, headroom and structural requirements must be coordinated early. Pneumatic or vacuum lifts may reduce some civil work and create a distinctive visual feature, but cabin size, operating characteristics, acoustic comfort and local service support require close evaluation.
Selection should not be based on appearance or initial price alone. Compare usable cabin size, door width, rated load, travel height, ride quality, energy use, noise, rescue system, warranty, annual maintenance cost, spare-parts availability and response time in Lucknow.
Before finalising a model, request a site-specific technical drawing, written scope of civil and electrical work, power and backup requirements, safety features, maintenance terms and references from operational installations. The most suitable lift is the one that fits the household, building and long-term service environment—not simply the most fashionable technology.
Coordinate Power, Safety and Emergency Provisions
A home elevator is a building service, not a standalone appliance. Its power supply, protective devices, earthing, cabling route, controller location and backup arrangement should be coordinated with the villa’s electrical design from the beginning. The selected manufacturer’s confirmed electrical requirements must guide this work.
During a power interruption, passengers should have a safe and clearly explained means of reaching a landing or obtaining assistance. Depending on the chosen system, this may involve automatic rescue operation, battery backup, an emergency alarm, two-way communication or integration with the villa’s backup-power system. These features and their limitations should be demonstrated during commissioning.
Safe ownership also depends on regular servicing, documented inspections and access to trained local technicians. Emergency instructions and service contacts should be visible near the lift, while family members and household staff should know whom to call and what not to attempt if the lift stops.
Design a Step-Free Arrival and Clear Circulation
Future-ready access begins at the property entrance, not at the elevator door. The route from the gate or parking area to the main entrance should avoid unnecessary level changes and provide a firm, slip-resistant surface. Where a ramp is required, its gradient, landings, handrails, drainage and edge protection should be professionally designed for the site rather than added as an afterthought.
Inside the villa, circulation should remain intuitive and sufficiently clear around entrances, bedrooms, bathrooms, living areas and the lift lobby. Flush thresholds, easy-to-operate doors, uncluttered passages and adequate turning space can assist older residents, wheelchair users, children, guests carrying luggage and anyone recovering from an injury.
These measures need not change the villa’s character. When integrated with the flooring, landscape and interior detailing, accessible circulation can feel generous, calm and naturally luxurious.
Create a Senior-Friendly Bedroom Suite
At least one bedroom suite should be planned where it remains easily accessible from the entrance, principal living spaces and the home elevator. In many villas, a well-designed ground-floor suite provides valuable independence if using stairs later becomes difficult or temporarily impossible.
The room should allow comfortable movement around the bed, convenient access to wardrobes and a clear route to the attached bathroom. Switches, sockets, bedside controls and storage used every day should be easy to reach. Balanced natural light, effective ventilation, glare-controlled artificial lighting and space for a supportive chair can improve daily comfort.
Privacy is equally important. The suite should feel like a desirable bedroom—not a medical room—while allowing space for assistance or suitable furniture if future care needs change.
Make Bathrooms Safer Without Making Them Institutional
Bathrooms deserve particular attention because wet surfaces, restricted movement and changes in level can increase the risk of falls. A future-ready bathroom should have an uncluttered layout, slip-resistant flooring, effective drainage, good ventilation and bright, glare-controlled lighting.
A level-entry shower, suitably placed controls and provision for a fold-down seat can make bathing easier. Reinforcement concealed within selected walls allows grab rails to be installed securely if required later. The basin, WC, shower enclosure and door arrangement should also leave enough space for comfortable movement and possible assistance.
Safety features can be integrated discreetly through coordinated finishes, elegant fittings and well-positioned accessories. The objective is not to create a hospital-like room, but a dignified bathroom that remains comfortable and practical as mobility changes.
Plan Flexible Rooms for Changing Families
Family needs rarely remain fixed. A nursery may become a study, a teenager’s room may later accommodate returning adult children, and a guest room may eventually be used by a caregiver. Planning rooms with adaptable proportions and services allows these transitions to happen with minimal reconstruction.
Flexible rooms benefit from good daylight, adequate storage, convenient electrical and data points, acoustic privacy and access to a nearby bathroom. Avoid overly specialised built-in furniture or layouts that restrict the room to one purpose. Where appropriate, movable furniture and demountable partitions can provide greater freedom.
Privacy should also be considered at household scale. Independent bedroom zones, a small sitting area or pantry provision can help different generations share the villa while retaining personal space and dignity.
Improve Everyday Safety, Lighting and Wayfinding
Future-readiness is often achieved through details that are almost invisible. Continuous handrails on staircases, secure balustrades, consistent floor levels and slip-resistant surfaces can reduce everyday risks without compromising the interior design.
Lighting should support clear movement after dark. Layered illumination, bedside controls, two-way switching, night lights and motion-activated lighting along passages or stairs can be useful. Avoid deep shadows and excessive glare, particularly near level changes, bathrooms and entrances.
Clear visual contrast can also make doors, switches, stair edges and important fittings easier to identify. Simple circulation routes, recognisable landmarks and clearly organised storage help residents navigate the home confidently as eyesight, memory or mobility changes.
Support Caregiving Without Reducing Independence
A future-ready villa should make assistance possible without assuming that older residents will lose independence. Bedroom and bathroom layouts can allow occasional help, while well-planned storage, reachable controls and comfortable circulation enable residents to manage daily routines themselves for longer.
If a caregiver may eventually stay in the home, consider a modest private room with convenient access to the senior suite without placing both spaces directly inside one another. This supports timely assistance while preserving privacy for everyone.
Technology can supplement thoughtful planning through video door communication, emergency-call buttons, selected sensors or simple home automation. However, essential functions should remain easy to operate manually, with clear controls and reliable support. Technology should increase confidence—not create dependence on complicated systems.
Future-Ready Villa Planning Checklist
• Prepare a long-term household brief before fixing the layout.
• Reserve and coordinate the elevator zone on every required floor.
• Verify lift dimensions, civil work, power, safety and service requirements in writing.
• Create a step-free route from the gate or parking area to essential indoor spaces.
• Provide at least one easily accessible bedroom suite.
• Plan a safer bathroom with level access and concealed support for future grab rails.
• Keep circulation clear, intuitive and well lit.
• Design flexible rooms that can change purpose over time.
• Preserve privacy for different generations and any future caregiver.
• Choose technology that is simple, reliable and manually operable.
• Record maintenance schedules, warranties and emergency contacts.
• Review the design with the architect, structural engineer, services consultants and relevant specialist vendors before construction.
A Future-Ready Villa Is Designed to Adapt
The true luxury of a future-ready villa is not a collection of visible features. It is the confidence that the home can support changing ages, abilities and family arrangements without losing comfort, beauty or dignity.
Early provision for a home elevator, step-free circulation, an accessible bedroom suite, safer bathrooms, flexible rooms and dependable building services can prevent disruptive alterations later. These decisions are most effective when they are coordinated as part of one architectural and engineering strategy rather than added separately.
Planning a new villa or reviewing an existing home in Lucknow? Aurevia Luxury Villas can help develop a thoughtful design brief that balances present aspirations with long-term adaptability.
WhatsApp: 7838981189
Email: ashwini@aurevialuxuryvillas.com
Website: www.aurevialuxuryvillas.com
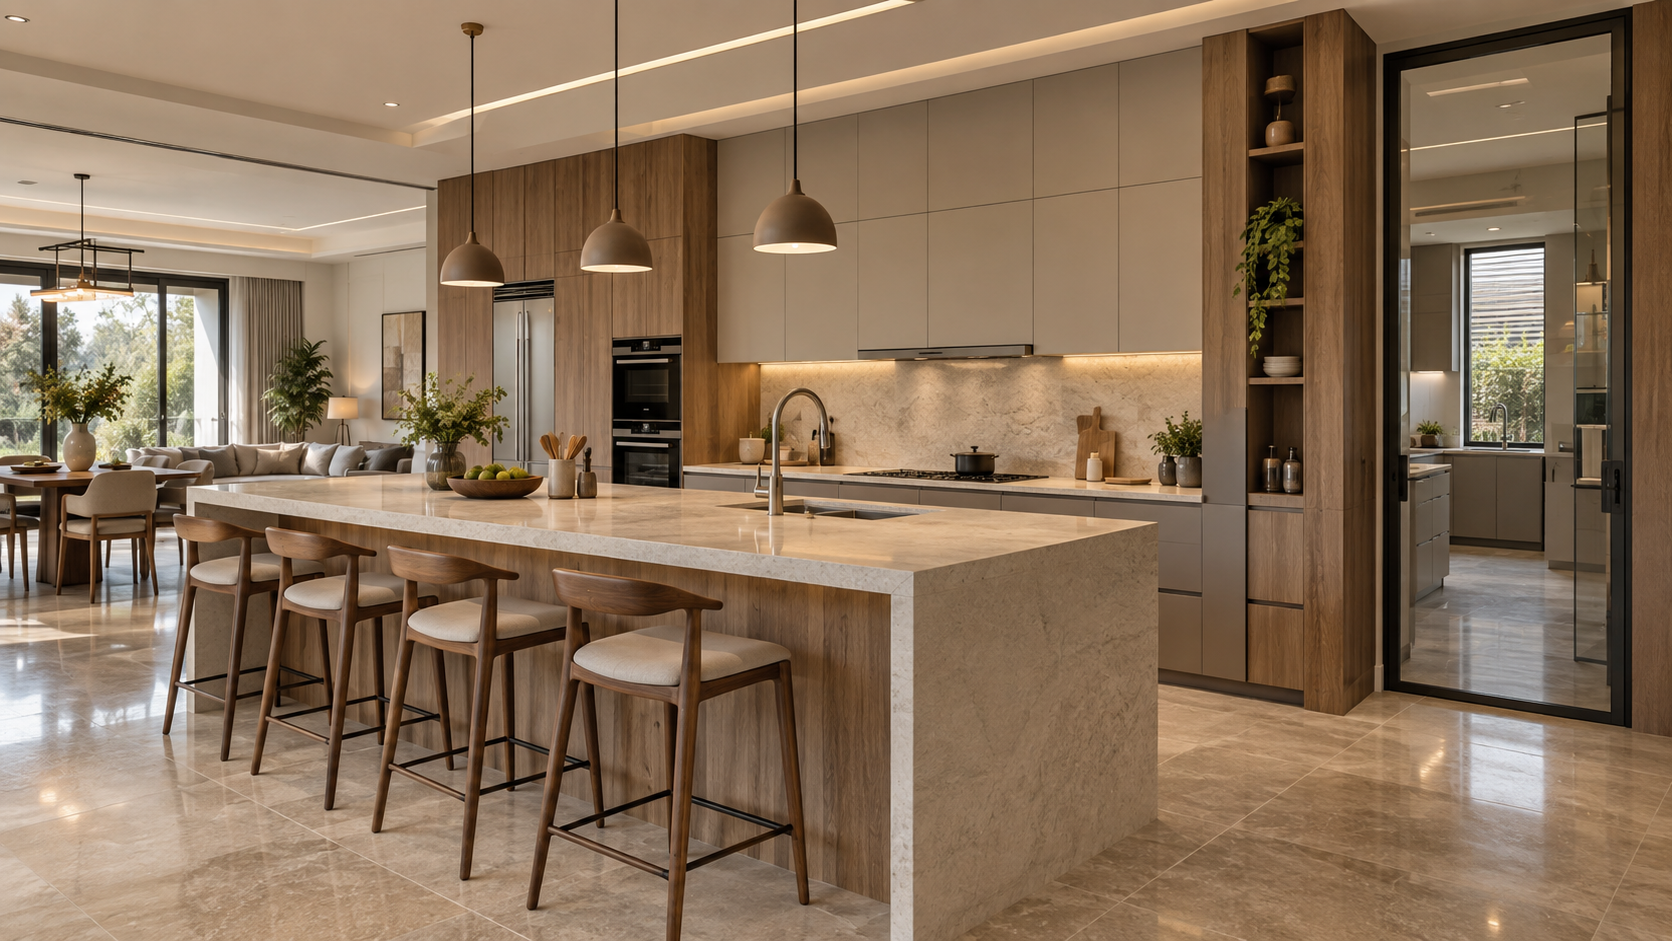
Luxury Kitchen Trends 2026: Display Kitchens, Utility Kitchens and Smarter Storage
Explore how display kitchens, utility kitchens and smarter storage can create a refined, practical kitchen for modern luxury villas in Lucknow. Learn how lifestyle, workflow, ventilation, lighting, materials and technology should shape the design.
In a luxury villa, the kitchen is no longer expected to perform a single role. It may be a social space connected to the living and dining areas, a hardworking zone for everyday Indian cooking, and an organised storage system for groceries, appliances and serving ware.
This is why many 2026 kitchen conversations are moving beyond finishes and fashionable colours. Homeowners are increasingly considering whether a display kitchen and a separate utility kitchen suit their lifestyle, how storage can reduce visual clutter, and how lighting, ventilation, plumbing and electrical services should support the complete plan.
For villas in Lucknow, these decisions also need to reflect household size, cooking habits, domestic support, dust, heat and maintenance. This article explores how display kitchens, utility kitchens and smarter storage can be coordinated into a practical and refined whole—without assuming that every home needs the same arrangement.
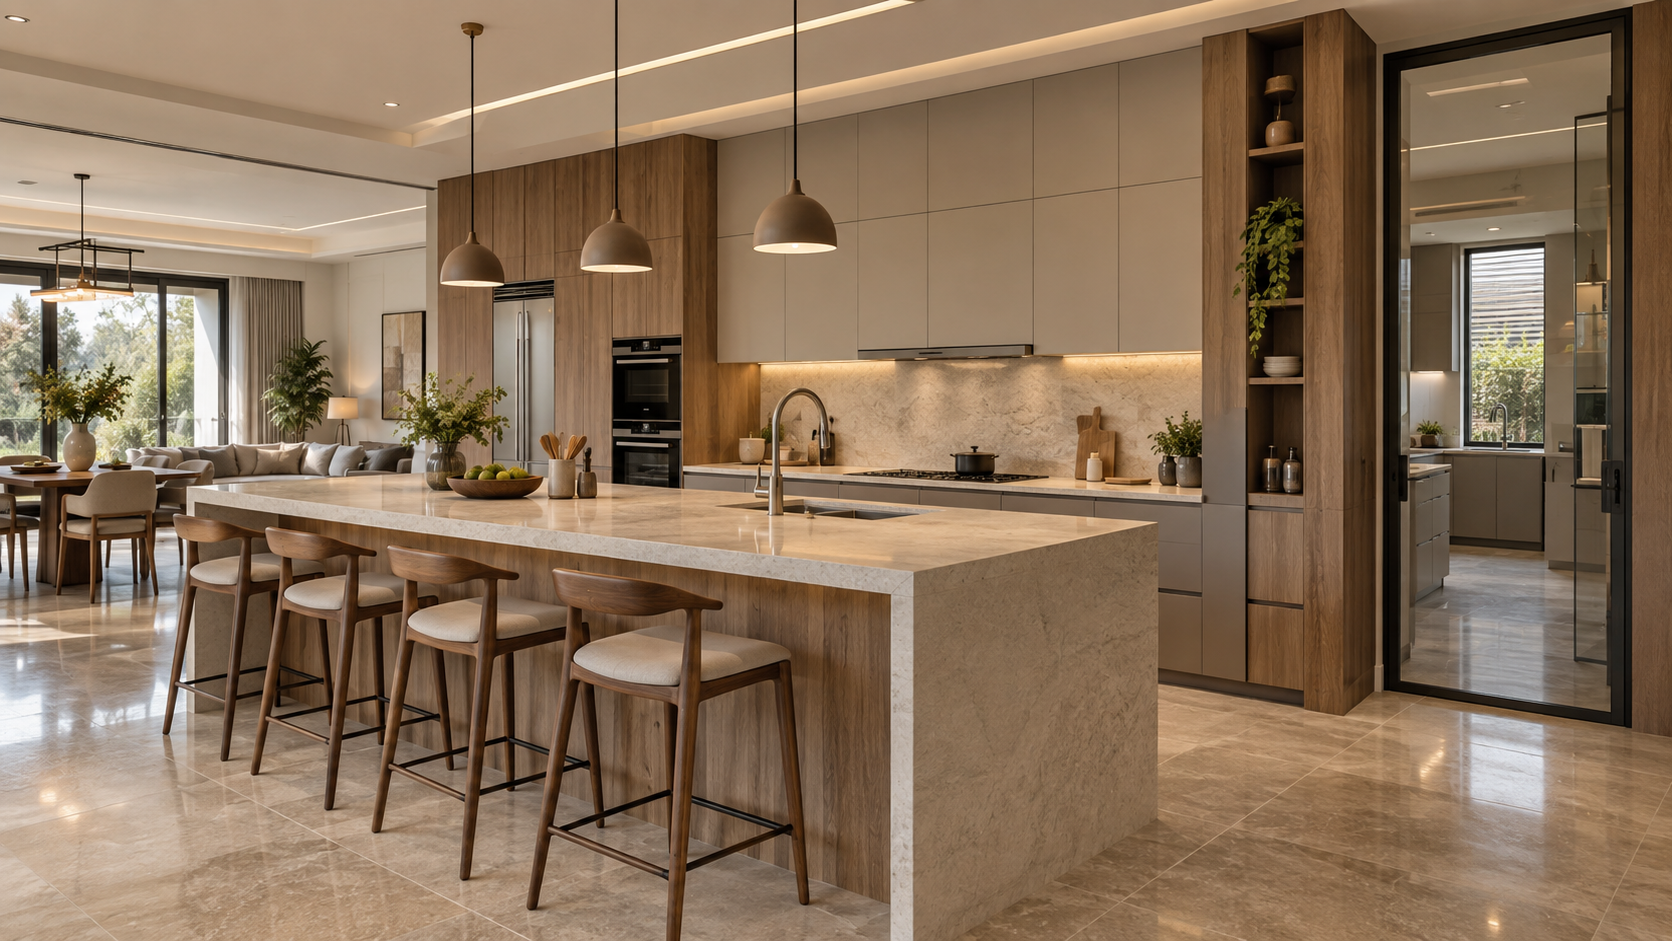
Contemporary luxury villa kitchen with a stone island, integrated storage, warm wood finishes and a separate utility kitchen behind a glazed door.
Start with Lifestyle, Not a Kitchen Trend
Before deciding on a display kitchen, utility kitchen or large island, map how the household actually cooks and entertains. Consider the number of regular users, the frequency of elaborate meals, dietary preferences, domestic support, grocery-buying patterns and whether guests usually gather around food preparation.
A visually open kitchen may suit a family that enjoys light cooking and social interaction. Another household may need stronger separation for frying, tempering spices, bulk preparation or frequent catering. The right arrangement is therefore a response to everyday routines—not a status symbol or a copied showroom layout.
Prepare a simple activity list before fixing the plan: daily cooking, breakfast, beverage preparation, washing, waste handling, appliance use, pantry access and serving. This brief helps establish which functions can remain visible, which need separation and how people should move between them.
The Display Kitchen: Designed for Connection
A display kitchen is the more visible, presentation-oriented part of the home. It may open directly into the dining or family-living area and support breakfast, beverages, light preparation, serving and informal conversation.
Its luxury comes from proportion, restraint and integration rather than an excess of decorative features. A well-planned island can provide preparation space and seating, while tall cabinetry can conceal refrigeration, ovens and small appliances. Durable worktops, comfortable lighting and a limited material palette help the kitchen relate calmly to adjoining interiors.
Visibility also raises practical questions. Surfaces need to be easy to clean, frequently used items require convenient storage, and clutter should not migrate onto the island. If significant cooking will occur here, ventilation, heat, noise and safety must be resolved rather than hidden behind a polished appearance.
The Utility Kitchen: A Hardworking Support Zone
A utility kitchen can take on intensive preparation, frying, spice tempering, bulk cooking, dishwashing or other activities that create heat, vapour, odour and noise. It is most useful when these tasks genuinely occur often enough to justify a separate zone.
Separation should not make the workflow inconvenient. The display and utility kitchens need a clear relationship, with sensible access to refrigeration, dry storage, washing, waste handling and serving areas. A closable door or glazed partition may help contain cooking effects while preserving visual connection, but its position and operation should be resolved in the plan.
This space deserves the same design discipline as the visible kitchen. Provide effective extraction, make-up air where required, adequate worktop and landing space, task lighting, durable finishes, safe electrical points and easy-to-clean junctions. A cramped leftover room with poor ventilation will not function as a genuine utility kitchen.
Smarter Storage Begins with an Inventory
Storage becomes intelligent when it reflects what the household owns, how often each item is used and where it is needed. Before designing cabinetry, list cookware, crockery, dry groceries, spices, small appliances, cleaning supplies, recycling and occasional entertaining items.
Frequently used utensils and ingredients should sit within comfortable reach of their activity zone. Deep drawers can make heavy pots easier to access than low shelves, while internal dividers can organise cutlery, plates and spice containers. Tall pantry units may use vertical space efficiently, provided their contents remain visible and reachable.
An appliance garage can conceal selected countertop equipment while keeping it ready for use, but ventilation, electrical access and door clearances must be coordinated. Corner mechanisms, pull-outs and premium hardware should be chosen only when they improve access and can be maintained; more moving parts do not automatically make storage smarter.
Plan Workflow Before Fixing the Island
A generous island can be useful, but it should follow the workflow rather than dictate it. First position the refrigerator, pantry, sink, preparation surface, cooktop and serving route so that routine tasks can happen without unnecessary crossing or congestion.
Provide enough clearance for cabinet doors, appliance doors and people to move simultaneously. Seating should not obstruct the main cooking path, and stools should have comfortable knee space. If the island contains a sink or cooktop, coordinate plumbing, drainage, power, extraction and maintenance access before construction begins.
In larger households, zoning can be more valuable than a single traditional work triangle. Separate preparation, cooking, washing, beverage and serving zones allow several people to use the kitchen with less conflict. Test the proposed plan against a typical breakfast, a full family meal and a gathering before approving it.
Layer Lighting and Electrical Planning
A luxury kitchen needs more than decorative pendants. Begin with useful daylight, then layer general lighting with focused illumination over preparation surfaces, the sink, cooktop and pantry interiors. Position fittings to limit shadows cast by the person working at the counter.
Decorative lighting above an island can strengthen the visual connection with adjoining living spaces, but its size and height should not obstruct views or create glare. Select a consistent light appearance and provide separate controls so the kitchen can shift from task-focused use to a softer evening setting.
Prepare an appliance schedule before finalising electrical points. Confirm the load, circuit, socket type, ventilation and service access required for each appliance. Provide conveniently located outlets for movable equipment without creating trailing cables, and coordinate concealed lighting drivers so they remain accessible for future replacement.
Coordinate Ventilation, Plumbing and Waste
A kitchen’s invisible services determine much of its long-term performance. Plan the extraction route early and discharge cooking air safely outdoors rather than into a ceiling void or another enclosed space. The hood and duct arrangement should suit the intended cooking load, with access for cleaning and maintenance.
Coordinate sinks, dishwashers, water purifiers, refrigerators and floor drainage with the plumbing layout before cabinetry is manufactured. Provide accessible isolation valves and service points, protect vulnerable junctions against leakage, and avoid routing that consumes useful storage or becomes impossible to repair.
Waste storage should be convenient to the preparation and cleaning zones without obstructing circulation. Separate containers may be provided for wet waste, dry recyclables and other household waste according to local arrangements. Design the cabinet for cleaning, ventilation and easy removal—not merely to conceal the bins.
Choose Materials for Heat, Moisture and Daily Cleaning
Kitchen materials should be selected for their actual location and use—not appearance alone. Worktops must tolerate regular cleaning, moisture and the expected level of heat and impact. Cabinet finishes near the sink, cooktop and dishwasher should resist water, grease and frequent handling.
Consider the entire assembly rather than only the visible surface. Cabinet carcasses, edge sealing, adhesives, hardware and wall junctions all influence durability. Details around sinks, backsplashes and floor edges should prevent water from entering concealed areas where damage may remain unnoticed.
For Lucknow’s dust and seasonal humidity, simple surfaces and accessible junctions are usually easier to maintain than heavily textured finishes or intricate grooves. Request material samples, review cleaning requirements and confirm repairability before approving a large quantity.
Use Smart Technology Selectively
Smart appliances and controls are valuable when they simplify a genuine household need. Useful options may include timers, temperature alerts, water-leak sensors, energy monitoring, automated lighting scenes and appliances that provide clear maintenance notifications.
Before selecting connected equipment, consider internet dependence, software support, data privacy, compatibility and the availability of local service. A conventional appliance with reliable controls and accessible spare parts may sometimes be a wiser choice than a feature-rich model that becomes difficult to maintain.
Keep essential kitchen functions operable even if an app, network or automation system fails. Technology should support safety, convenience and efficiency without making ordinary cooking unnecessarily complicated.
Design for Accessibility and Future Change
A comfortable kitchen should work for people of different ages, heights and abilities. Keep frequently used items within easy reach, provide clear circulation, avoid sharp projections and ensure that flooring remains stable and slip resistant.
Drawers and pull-out shelves can reduce bending and make stored items easier to see. Good task lighting, contrasting edges where useful, lever-style handles and conveniently positioned controls can improve everyday use without making the kitchen appear institutional.
Household needs and appliances may change over time. Where practical, allow selected cabinets, shelves and internal fittings to be adjusted or replaced without disturbing the entire kitchen. A flexible design can remain useful longer and reduce the cost and waste of future alterations.
A Refined Kitchen Is a Coordinated Kitchen
The most successful luxury kitchens are not defined by a single fashionable finish, oversized island or collection of expensive appliances. Their quality comes from coordinating lifestyle, workflow, storage, services, materials, lighting and maintenance from the beginning.
A display kitchen and utility kitchen can be an effective combination when each has a clear purpose and the movement between them feels natural. In other homes, one carefully planned kitchen may be the more practical solution. The right decision depends on the people who will use the space every day.
Planning a new villa or reconsidering your kitchen layout? Aurevia Luxury Villas can help develop a coordinated design brief suited to your household, site and aspirations.
WhatsApp: 7838981189
Email: ashwini@aurevialuxuryvillas.com
Website: www.aurevialuxuryvillas.com